How to Keep Your Desk Organized—Whether at Home or at the Office

Whether you work from home or in a traditional office, it takes no time at all for your desk to go from spic and span to dusty and disorganized. Even if you take special care to put things in their proper place, you need the right organizational tools to keep up a tidy workspace. Here are four hacks that will add both style and organization to your desk.

  1. Pick one pen and one pencil. If you're guilty of having an unnecessary abundance of pens and pencils—yet you can never seem to find one when you need one—it's time to downsize….your pencil cup. Pick just one good (working) pen and a single pencil, and keep the rest tucked away in a drawer. Put them in a specific spot and return them to their home as soon as you use them to avoid the clutter of multiple writing utensils.
  2. Hang cute clipboards for paper clutter. Stacks of paperwork aren't exactly a style statement, but hanging clipboards can be—if you decoupage them with scraps of wallpaper first. Then hang them in rows on your cubicle wall and assign each clipboard a specific job—one for junk mail, one for outgoing paperwork, etc.
  3. Organize office supplies with a pegboard. In a similar vein, you can hang a pegboard on your wall and stock it with pouches and pegs for various office supplies. Scissors, tape, maybe even a stapler can all hang in plain view, just keep the arrangement organized.
  4. Opt for accordion folders. Instead of constantly dealing with a slew of manila folders, make the switch to accordion folders. They come in cute colors and patterns, and they can hold the equivalent of many manila folders, which makes them much more useful for organizing.

Office Organization Ideas for Disaster-Zone Desks [Martha Stewart]
10 Good Things for a Highly Efficient Home Office [Martha Stewart]
12 Tips for an Organized Desk [Productivity501]
Your Handy Guide to Spring Vegetables

Spring is a bountiful season when it comes to gardening, full of fresh fruits and vegetables that add bright flavors to your meals. If you want to take advantage of what’s in season in the springtime, these nutritious vegetables will help you get started.

  1. Beets. Beets have been having a moment for the past couple years, and for good reason. What used to be the skipped-over bowl in the salad bar is now a popular addition to juices, salads, and even breads and desserts.
  2. Asparagus. Dense with vitamins and nutrients and full of hearty flavor, asparagus is especially plentiful in the springtime.
  3. Spinach. Green, leafy veggies, like mild-tasting spinach, grow especially well in the spring, and they make much more nutritious bases for salads than the usual iceberg lettuce.
  4. Peas. Forgo canned peas in favor of fresher, more flavorful peas right from the produce aisle or farmer’s market. They’re simple to prepare and have a wide variety of uses, and peas grow rapidly all throughout the spring season.
  5. Artichokes. Slice them up for sandwiches or toss them in a salad. However you serve artichokes, they’re always a pleasant surprise.
  6. Zucchini. You’re likely bombarded with zucchini each spring from friends and neighbors with garden surpluses, but that’s never a bad thing. Zucchini is full of healthy nutrients, and its versatile consistency makes the squash a great ingredient for everything from breads to stir-fries.

What's In Season? [Oprah.com]
Spring Vegetables Slideshow [Bon Appetit]

Public Domain/Public Domain

Refinish a Well-Loved Wooden Cutting Board With These 4 Tips

Is your wooden cutting board looking a bit worse for the wear? With all of the slicing and dicing that goes on on your cutting boards, it’s no surprise that they need a bit of refurbishment every now and then. Use these simple tips for breathing new life into an old cutting board.

  1. First, disinfect your cutting board (especially ones that you use to cut meat) by diluting one teaspoon of bleach in two quarts of water. Dip a scrub brush in the solution and scrub the cutting board in small circles, and then wipe the surface with a damp paper towel and buff dry with a cotton cloth.
  2. Next, buff out any deep cuts using a very fine grade sandpaper. You may even want to choose two types of sandpaper so that you can buff out the cuts with one, and then smooth the surface with the other. Don’t leave behind any scratches, as these can collect bacteria.
  3. Condition your cutting board with mineral oil on a soft cloth. Don’t use vegetable or olive oils, as these can turn rancid with exposure. Buff the oil into the board using a thin rag, and make a note to retreat the board at least 3 or 4 times a year as needed.
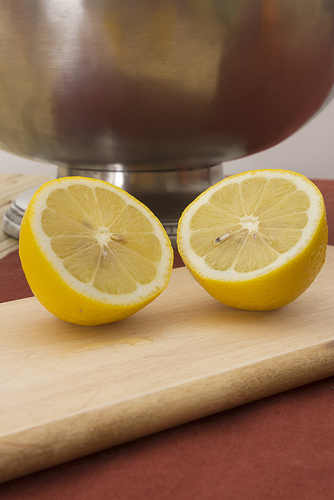
  4. Once your cutting board is clean, keep it fresh after each use by cutting a lemon in half and rubbing it all over.

How to Clean a Cutting Board: 7 Effective Treatments [Reader’s Digest]
How to Restore and Maintain a Wood Cutting Board or Butcher Block [HGTV]
How To Clean, Deodorize and Condition Wood Cutting Boards Naturally [Apartment Therapy]

5 Interesting Facts About Artist Edgar Degas

The stunning paintings of young dancers and women by Edgar Degas are well loved by many arts patrons. Degas used his classical techniques and merged it with his avant-garde, impressionistic tendencies to create singular portraits of modern life in Paris during the late 1800s. There are a few things you might not know about this important artist, like these five facts:

Degas initially studied law.
At the request of his father, Degas enrolled into the Faculty of Law of the University of Paris. It didn’t suit him well, and Degas left the school two years later to study his true passion—art—at the Ecole des Beaux-Arts.

Degas never married.
For all of the time he spent with women, drawing, painting, and obsessing over them, Degas never took a wife. He had intimate relationships throughout his life, occasionally with famous artistic women like Mary Cassatt, but the painter remained a bachelor until his death.

New Orleans was his second home.
Degas was born in Paris to a French father and American mother, who was from New Orleans, Louisiana. As an adult, Degas spent much of his time between the two cities, often staying for long periods in New Orleans during the French-Prussia War. His painting "The Cotton Exchange at New Orleans" was inspired by the city and was the only work purchased by a museum during his lifetime.

He collected art.
Degas was a rare type of artist who enjoyed financial success, unlike many of his contemporaries. This allowed him the ability to purchase artwork to create a collection that included work from Cézanne, Gauguin, and Van Gogh.

He stopped painting.
Toward the end of his life, Degas suffered from terrible sight problems. Embittered by this problem, Degas stopped painting altogether. He focused on sculpture, experimented with photography, and promoted his own work. By the time he died in 1917, he had stopped his artistic endeavors altogether.

Edgar Degas [Biography]
Edgar Degas Biography [Edgar Degas]
Edgar Degas Biography [Modern Art Muse]

Irresistible Football-Themed Finger Foods for Game Day

Game day is coming up, and you’re already wondering what to add to your viewing party menu. Finger foods are always a convenient option, but you might want something a bit more sophisticated than the usual nachos and corndogs. Here are three great football-themed finger foods that even the most foodie guests will love.

Zesty Popcorn Mix [bhg.com]
Instead of grabbing a bag of snack mix from the grocery store, make your own using flavorful herbs, spices, and other ingredients. This recipe shows you how to create a sweet, spicy, and salty mixture using unlikely combinations, such as dried apricots, cayenne pepper, and popcorn.

Shanghai Spring Rolls with Sweet Chili Sauce [myrecipes.com]
For an Asian-inspired appetizer, these tasty spring rolls have a gourmet taste without the gourmet preparation. Simply combine ground pork, fresh shrimp, and vegetables with a homemade sweet chili sauce on the side, and wrap the whole thing up in spring roll wrappers to create a handheld dish your guests will devour.

Football Cheese Ball [allrecipes.com/]
Transform the usual cheese ball into a football to make the perfect dish for your upcoming game day bash. This one is especially great if you’re pressed for time, as it’s very easy to whip up and serve with your favorite crackers.

Make These DIY Holiday Gifts

If you’re strapped for cash this holiday season or a bit burned out from all of the crowded malls, you may want to make gifts by hand for your loved ones instead of purchasing them. Here are three great ideas for handmade holiday gifts that are much more special than something store-bought.

Mason Jar Soup Mixes
If you’re searching for the perfect gift for a foodie friend, try making homemade soup mixes in adorable mason jars. This tutorial offers more than 30 different types of soups to choose from, and the various ingredients will look decorative and colorful when layered inside of the jar.

Snuggly Shawl
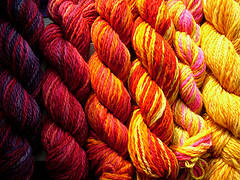
This stylish shawl is easy to make as a gift no matter your level of knitting expertise. It’s so simple that you can work on it bit by bit while you relax at home, and the end result is so fashionable and functional that your loved one will wear it all winter long.

Peppermint Candy Sugar Scrub
For the beauty product enthusiast, this DIY sugar scrub is a luxurious and deliciously scented holiday gift. All of the ingredients are entirely natural and safe to use, and the lovely pink and white colors look adorable when poured into the glass jar. Best of all, the peppermint scent is perfect for the winter season.

3 Interior Decorator Secrets Everyone Should Know

So you’re not an interior decorator by trade? No sweat! When it comes to decorating your rental, all it takes are a few tricks from the professionals to make your home look like it belongs on the pages of a design magazine. Here are a few secrets that interior decorators don’t mind sharing.

  1. Arrange furniture in the way that makes the most sense. If you’re constantly tripping over furniture or struggling to reach things on shelves, you likely don’t have your room arranged in the most functional way. Don’t be afraid to rearrange the room until it works — or even to get rid of pieces that you don’t really need.
  2. Add good lighting. If you’re lucky enough to have lots of windows in your apartment, play up the natural light with sheer curtains or neutral-colored blinds. If you don’t have much natural light, fake it with daylight-imitating light bulbs.
  3. Use light or neutral colors. Choose furnishings in light or neutral colors to create an airy, open feeling.
  4. Add art. Adding framed art to every wall is a great way to decorate your apartment without taking up precious space. Create an eclectic gallery wall or add a series of three large frames to create the illusion of depth. Don't forget to add mirrors!

11 Foolproof Decorating Tips [This Old House]
20 Decorating Secrets [House Beautiful]
9 Interior Decorator Secrets [Woman’s Day]

4 Tips for Serving a Safe Food Buffet

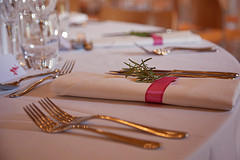
If you’re hosting a large party, you’re likely concerned with serving tasty foods, but your goal should also be to keep those foods safe for your guests. Here are a few helpful tips that will keep your food buffet just as healthy as it is delicious.

  1. Wash your hands. The first thing you should do when preparing a food buffet is wash your hands. This prevents you from spreading germs to your guests, but it also helps to keep you safe from food borne illnesses caused by raw meat, eggs, and other ingredients. Be sure to wash your hands each time you refill the buffet, as well.
  2. Cook foods completely. It’s safe to keep foods out on a buffet, provided that they’re cooked properly beforehand. Meats like beef and pork chops should be cooked to at least 145º F, while chicken and poultry should reach at least 165º F.
  3. Use the proper serving tools. If you’re serving hot foods, be sure to store them in a chafing dish, slow cooker, or warming tray to keep them from changing temperature. Cold dishes can be served in nesting bowls over bowls of ice, and they must stay at 40°F or lower in order to stop the growth of bacteria.
  4. Abide by the two-hour rule. Finally, never let foods sit on a buffet for more than two hours. Tossing food that’s been at room temperature for too long will ensure a safe and healthy party.

Serving Up Safe Buffets [FDA]
Serving Prepared Foods Safely [Whole Foods]
Holiday or Party Buffets [USDA]
Buffet Safety [NSF]

These DIY Halloween Decorations Are So Easy to Make, It’s Scary!

Making your own Halloween decorations is a whole lot more fun than buying them at the store, and there are many projects that might be easier that you'd expect. No matter how artistically inclined you are, you’ll love these simple ideas for decorating your home for Halloween.

Candy Corn Centerpiece [diyncrafts.com]
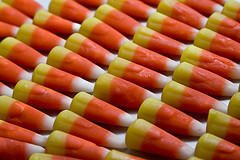
Turn an old wine or beer bottle into a candy corn-inspired centerpiece that’s perfect for Halloween parties. Simply spray paint shades of yellow, orange, and white onto unused glass bottles and arrange them however you please. As a bonus, you can even set out bowls of real candy corn for guests to snack on.

Tissue Paper Jack O’Lanterns [countryliving.com]
Instead of carving a messy pumpkin with sharp knives, create an equally festive jack-o’-lantern out of some simple tissue paper balls from the craft store. Cover them with construction paper facial features to make an entire army of adorable faux pumpkin faces.

Recycled Paper Bats [treehugger.com]
Do a bit of good for the environment by using recycled construction paper to create these sweet and scary hanging bats. Since they use an easy origami pattern, you can even construct these realistic bats without any cutting or gluing.

Clever Storage Solutions for Jewelry and Accessories

Storing jewelry and other accessories can be quite difficult, especially if you don’t have a lot of space to spare. Luckily, there are a number of creative ways to store all of those bits and baubles and keep them neatly tucked away.

Shadow Box Jewelry Holder [marthastewart.com]
This unique DIY project turns your favorite necklaces into a work of art. Simply line a shadow box frame with a piece of pretty wallpaper, add a few hooks and hang your necklaces inside. By removing the glass on the front of the frame, you’ll have easy access to your favorite jewelry pieces.

Dress Form Jewelry Holder [luckyshops.com]
If you love all things vintage, you’ll especially love the look of this retro jewelry display. Simply drape all of your necklaces around the neck of an antique dress form, and even place a hat on its head for good measure.

Jelly Jar Hair Accessory Holder [glamour.com]
If you have trouble keeping track of your hair ties and bobby pins, you can use this simple tutorial to keep them neatly corralled. Just slid elastic hair ties around the outside of an old jelly jar, then place the bobby pins and hair clips inside of the jar to store them together.

Pin It on Pinterest