Neat and Nifty DIY Projects for Your Kitchen

While you may not be able to pull off a full kitchen renovation in your rental, you can make the space function better for your needs by crafting up a few simple projects. Here are just three useful DIY projects that will improve your kitchen space and help make it your own.

Dip-Dye Wooden Spoons [housebeautiful.com]
Looking to add more color to your kitchen without going overboard? This simple tutorial will add rainbow hues to your wooden kitchen utensils, and best of all, it takes less than an hour to complete. Store them upside down in a large ceramic jar to show off their fun new makeover.

Additional Cabinet Storage [lifehacker.com]
If the items in your kitchen cabinets are always stacked precariously on top of one another, you could likely benefit from additional storage. Add a tension rod for additional storage, or add a classic Lazy Susan so that you can reach things like spices and small jars with ease.

Cutting Board Tablet Stand [countryliving.com]
If you frequently use your iPad or other tablet to look up recipes or listen to music in the kitchen, keep it protected by creating your own stand out of an old cutting board. Simply attach a wooden Scrabble tile stand to the bottom to hold up the tablet, then prop up the entire cutting board using an old door stop on the back.
Clear Clutter from Everywhere in the Bathroom With These 4 Tips

If you’re short on space in your bathroom, it can be difficult to keep things neat and organized. Since many renters share their bathroom with guests, however, you’re likely always looking for ways to clean it up quickly. These 4 tips make it easy to banish clutter from the bathroom—and keep it clean for good.

  • Consider the essentials. Most renters store much more than they actually use every day in their bathrooms. Go through the contents of your medicine cabinets and under-sink storage areas and get rid of all of those specialty products and expired items (or at least find somewhere else to store them).
  • Add additional storage where it’s needed. If you can’t find enough storage in your bathroom after you purge your essentials, it may be time to create your own. Add wall shelves, a storage unit over the toilet or even just a few baskets under the sink.
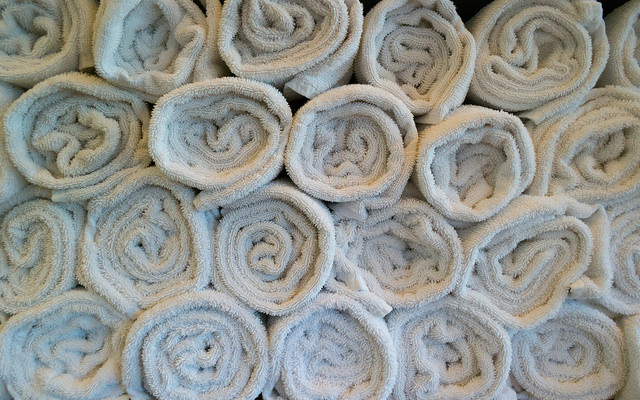
  • Invest in matching sets. If your bathroom is often filled with mismatched towels, get rid of the ones you don’t use and attempt to create a matching set. By replacing those old, faded towels with bright, fluffy new ones (and cutting down on the amount of towels in general), you’ll reduce unnecessary clutter.
  • Add over-door storage. Hang an additional towel rack over the back of the door to give wet towels ample room to dry.

Decluttering the Bathroom [HGTV]
Small Bathroom Ideas: 5 Effective Decluttering Tips for a Tidier Space [Apartment Therapy]
Cut Clutter in the Bathroom: Easy as A-B-C! [Organized Home]

How to Get the Most Storage Space Out of Your Freezer

If you’re looking for a way to add extra storage space to your current freezer, these smart tips may be of service.

  1. Know what to freeze. Start streamlining what you freeze in the first place by knowing what will last and what won’t. In general, leafy vegetables, dairy products, and fried foods are not meant to freeze.
  2. Separate items into portions. If you’re freezing something that would otherwise stick together after freezing, such as chicken breasts or soup, separate it into serving-sized portions so that you can easily thaw only the part that you need.
  3. Use containers. Instead of piling all of your food into one large pile in the freezer, invest in freezer-safe storage containers from the local home goods store.
  4. Use labels. Label everything in the freezer, from individual food items (unless they’re still in the original packaging) to your storage containers.
  5. Mind the door. The door of the freezer is the warmest part, so don’t store things that can easily melt on its shelves. Save this space for less delicate foods, such as nuts, alcohol, or frozen fruits.

Fridge and Freezer Organization [The Container Store]
The Best Way to Organize Your Freezer [The Kitchn]
8 Better Ways to Keep Your Freezer Super-Organized [Good Housekeeping]

Stylish Storage Solutions for Arts and Crafts Supplies

Whether you’re an avid crafter or your children are often doing art projects at home, you know how difficult it can be to find storage space for all of those paints, markers, fabrics, crayons, and other supplies. Here are just a few stylish ways that you can keep your arts and crafts supplies neatly organized until your next DIY project.

Mason Jar Storage System [redtri.com]
Turn your storage solution into an art project in itself. This colorful DIY idea involves covering old mason jars in fun, pattered washi tape, then using those jars to store everything from markers to paint brushes and even loose buttons.

Kids’ Craft Apron [www.bhg.com]
If your child has trouble keeping his or her craft supplies together while doing a project, you can make this simple apron as your next family art project. Simply take an old gardening apron, use the belt to tie it to the side of your child’s crafting table, and fill the spacious pockets with all of the essentials.

Hanging Storage Bins [apartmenttherapy.com]
Screw a metal rod from any home goods store into your wall, then attach S-shaped hooks and hang bins in all sizes from each hook. You can use these to keep your art supplies within reach but off of your tabletop.

Speed Through Laundry Day With These 4 Organization Tips

You love the fresh, clean feeling of having all of your laundry done, but getting there is a whole different story. Laundry day may be time-consuming, but there are ways to make it easier. Here are a few tips to help you organize your laundry and get it done in half the time.

  1. Sort laundry without even trying. It takes a lot of time to sort through your mountain of dirty clothes and separate the lights from the darks. Invest in a three-compartment hamper to do the sorting for you.
  2. Bleach more effectively. Bleaching seems like a fool-proof way to remove stains from white clothing, but it doesn’t always work as effectively as you’d like. The proper way to bleach clothes is by first letting the clothing soak in a pool of water. Add one cup of bleach and one cup of dishwashing detergent and let it soak for about half an hour. Finally, dump the whole thing into the washing machine and wash as you normally would.
  3. Prevent damage. To reduce fading, turn dark colored items inside out before washing. Use the cold water setting to prevent clothes from shrinking, and then hang them to dry instead of using the dryer. Also, only wash delicates, like bras and underwear, in a lingerie bag on the delicate cycle.
  4. Invest in a drying rack. Rather than tossing delicate items over the shower curtain rod or rigging some other kind of makeshift drying rack, invest in the real deal. They're usually inexpensive, and they fold into a flat shape to tuck away when not in use.

10 Tips and Tricks for Easier Laundry Days [Yahoo!]
Easy Laundry Tips [The Nest]
How to Do Laundry More Effectively [Babble]
13 Ways to Make Laundry Day Easier [BHG]

Pin It on Pinterest