Follow These Tutorials to a Cool and Kitschy Macrame Plant Hanger

Macramé may have originally gained popularity back in the 1970s, but the kitschy weaving craft is coming back in a big way. If you love plants and you’re always looking for fun new ways to display them, you may even want to try making a macramé plant hanger of your own. Here are a few tutorials to help you get started!

Colorful Polyester Rope Hanger [hgtv.com]
With this tutorial, you’ll learn how to make a macramé hanger using only a few colors of polyester rope, a carabiner, and a screw hook. The actual plant hanger itself is fairly simple, but wrapping the multicolored string around the top adds a fun pop of color.

Sturdy Macramé Plant Hanger [lowes.com]
If you’re looking for something that’s a bit sturdier to hang a particularly heavy plant, this is a great tutorial. It uses clothesline instead of the usual yarn or polyester rope, as well as 18-gauge steel wire and a chain ring for added reinforcement.

Mini String Planters [blog.freepeople.com]
For something quicker and easier, this cute tutorial from the Free People blog uses standard yarn that you might already have stashed away at home. This is a fun tutorial to do while you relax in front of the TV, and the finished product is a great way to hang small air plants or succulents in miniature pots.

How to Clean Your Microwave Without Harsh Chemicals

From reheating leftovers to warming up bowls of canned soup, your microwave sees a whole lot of messes from its various daily tasks. You may think that you need to use a store-bought cleanser to get out those tough, caked-on stains, but if you want to avoid those harsh chemicals, you can actually make your own cleanser at home. Follow these steps for cleaning your microwave in an all-natural way.

  1. Pour one cup of vinegar into a microwave-safe bowl, and then add one cup of hot water and stir the two together.
  2. Place the bowl with its vinegar solution in the center of the microwave and turn it on. Let it run on average power for 10 minutes.
  3. Keep an eye on the bowl and remove it from the microwave when you notice it starting to boil (likely somewhere between 5 and 10 minutes). Note: Be sure to use an oven mitt, as the bowl will be very hot.
  4. Wet a rag with lukewarm water and give the inside a good wipe-down to remove the now-loosened debris inside.
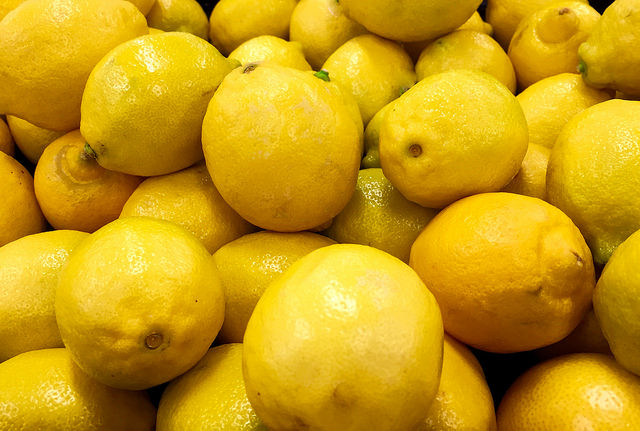
  5. Once all of the debris is steam cleaned away, create a simple solution of lemon juice and water. Dip another rag into the homemade cleanser and give the microwave another wipe-down to freshen things up.

How to Clean Your Microwave Naturally With Just a Lemon [The Kitchn]
How to Clean and Shine Your Microwave Without Cleaner [One Good Thing]
Use a Lemon to Make Cleaning the Microwave Easy [Lifehacker]

How to Create a Chic and Stylish Bar Cart

Bar carts are the types of finishing touches that add a major pop of designer flair to any room in the home. From the living room to the dining room, adding a well-curated bar cart will really give your home the type of 1950s style that is right on trend. Here are just a few tips for creating a truly chic bar cart.

  1. Start with the perfect cart. Scour flea markets and thrift stores for an authentic vintage bar cart. If you can’t find one there, try purchasing one at an affordable furniture store or even using a small three-tiered bookshelf.
  2. Choose your spirits. The types of spirits that you add to your cart really depend on your personal preferences. Investing in three or four bottles of common spirits like vodka, gin, and bourbon is a good place to start.
  3. Add your glassware. Next, invest in new or secondhand sets of wine glasses, low tumblers and martini glasses. You may even want to add decanters to fill with mixers or to trade out unattractive liquor bottles.
  4. Add the accessories. Fill a glass jar with stirrers, add a small cutting board for slicing lemons and limes and even add stacks of mixology books for the finishing touches.

How to Style a Bar Cart [The DIY Playbook]
How To: Create and Stylize the Perfect Bar Cart [Guest of a Guest]
Assembling the Perfect Bar Cart [Primer Magazine]
How to Style the Perfect Bar Cart for Any Party [HGTV]

Where to Shop Host and Hostess Gifts Online

Going to a party in the near future? It’s polite to bring a gift for the host or hostess, but it may be difficult to decide what to give. Luckily, there are a number of fun and affordable websites are packed full of great ideas that anyone will love. Here are three of the best places to shop for host and hostess gifts online.

Uncommon Goods
This foodie-friendly website is filled with gift ideas perfect for any avid entertainer. From self-chilling wine glasses to sets of unique salts and pizza cutters in silly shapes, these unique items make great host or hostess gifts.

Mark & Graham
If you’re looking for a gift that’s a bit more personal, Mark & Graham offers many items that can be customized with the recipient’s initials. Add etched initials to the side of a set of goblets, a copper ice bucket, or even trendy Moscow mule mugs, or create your own complete set of stylish barware.

Terrain
For the host with more romantic tastes, Terrain’s selection of pressed flower sachets, bottleneck vases, and enamel candlesticks are truly a delight. You’ll also find decorative candies and bottled cordials that are a bit more affordable for those on a budget.

3 Clever Uses for Coffee

Aside from its magical powers in the morning, coffee also has a number of other uses that you might not even know about. Here are a few clever, new uses for coffee.

  • Use coffee grounds as a deodorizer. Simply fill an open bowl with the grounds and let them absorb bad smells in the kitchen, an older car, or even in the refrigerator. Likewise, you can also scrub your hands with coffee grounds to remove smells after cutting onions or working with motor oil.
  • Create an all-natural dye. Steep coffee grounds in hot water, then use the liquid to add color to clothing, craft projects, and paper.
  • Make your own facial scrub. Many top-name beauty brands are already adding grounds to their exfoliating products, as the moist grinds are said to help remove impurities and brighten the complexion.

Top 10 Uses For Used Coffee Grounds [Curbly]
13 Surprising Uses for Coffee [Reader’s Digest]
16 Genius Uses for Coffee [All You]

How to Squeeze Every Inch Out of Your Apartment’s Square Footage

Use these smart, simple tips for squeezing every inch out of your apartment’s floor plan and you’ll be amazed at how much extra space you'll find!

  • Choose multifunctional pieces. Get rid of all of the furniture in your home that doesn’t play double-duty as something else. Choose sofas with built-in storage, a bed with hidden drawers, and a television credenza with a bookshelf to minimize the wasted space that comes from having too much furniture.
  • Arrange… and rearrange. Arrange your furniture as many times as it takes to find a perfect flow. You’ll want to be able to comfortably walk from room to room without bumping into things, which takes some trial and error. If something doesn’t fit, it likely means that you don’t have use for it.
  • Think vertically, not just horizontally. Many people forget about the horizontal space that they’re missing when furnishing a room. Add stacks of shelves on every wall, hanging organizers on the backs of doors, or new, custom storage systems from floor to ceiling in the closet.
  • Maximize natural light. Finally, replace dark drapes with sheer curtains to allow in as much light as possible and make your space feel brighter.

How to Maximize Space in a Small Apartment [Freshome]
Ten Apartment Organization Tips to Maximize Space [Forbes]
How to Maximize Your Apartment Space [For Rent]

Holiday Tree Trimming Tips From the Pros

There’s nothing more fun during the holidays than decorating the tree with the whole family, but you may want to make this year’s tree a bit more stylish. Instead of haphazardly placing ornaments all over its branches, check out these tips for decorating a truly chic and elegant holiday tree.

  1. Real or artificial? First, you must decide if you want to invest in a real tree or stick with an artificial option. While a real tree is a bit more rustic and will make your house smell divine, an artificial tree is much easier to manage.
  2. Choose a color scheme. One of the easiest ways to make your tree look more professional is by setting a color scheme. Reds and greens are always a great choice, but all-over gold or sparkling silver are also beautiful when accented by the twinkling lights.
  3. Hang small lights first. To create a base for your tree’s decorations, first hang small, white lights evenly all over.
  4. Add solid colored ball ornaments. Next, invest in multipacks of ball ornaments in your chosen color. Hang them all over the tree, leaving even amounts of space in between each one.
  5. Add personal ornaments last. To display more personal or keepsake ornaments without them looking too cluttered, add them in the empty spaces once all of the other ornaments are already in place. Voila—the perfect holiday tree.

How to Decorate a Christmas Tree Elegantly [WikiHow]
15 Christmas Tree Decorating Ideas [HGTV]
How to Decorate a Christmas Tree [Better Homes & Gardens]

Tips for a Dinner Party Your Guests Won’t Soon Forget

Dinner parties are fun ways to get all of your friends together to bond over tasty foods, but it can be a bit difficult to plan a menu for that many people. Whether you’re hosting a formal sit-down dinner or a casual taco night, these simple tips will show you how to plan a dinner party that no one will forget.

  1. Stick with the basics. While it may seem fun to experiment with a new recipe, this isn’t the best idea when you’re cooking for a group. Stick with something that you already know how to cook, or practice a new recipe at least once or twice beforehand.
  2. Choose a theme. If you’re unsure of what to make for dinner, choose a culinary theme, like Italian or childhood favorites. This will make it easier to choose dishes that go together.
  3. Don’t forget the appetizers. To buy yourself a bit of time in the kitchen, set out simple appetizers that guests can snack on while you put the finishing touches on the meal.
  4. Do some prep work. Prep as much of the food as possible the day before so that you’ll have ample time to visit with guests once the party begins.
  5. Consider seating. Most people don’t have a large, formal dining room, but you should still consider where your guests can sit comfortably.

Top 10 dinner party tips [Good Food]
25 Dinner Party Do's and Don'ts for a Host or Hostess [Bon Appetit]
The Dos and Don'ts of Hosting a Dinner Party [My Domaine]

How to Get the Most Storage Space Out of Your Freezer

If you’re looking for a way to add extra storage space to your current freezer, these smart tips may be of service.

  1. Know what to freeze. Start streamlining what you freeze in the first place by knowing what will last and what won’t. In general, leafy vegetables, dairy products, and fried foods are not meant to freeze.
  2. Separate items into portions. If you’re freezing something that would otherwise stick together after freezing, such as chicken breasts or soup, separate it into serving-sized portions so that you can easily thaw only the part that you need.
  3. Use containers. Instead of piling all of your food into one large pile in the freezer, invest in freezer-safe storage containers from the local home goods store.
  4. Use labels. Label everything in the freezer, from individual food items (unless they’re still in the original packaging) to your storage containers.
  5. Mind the door. The door of the freezer is the warmest part, so don’t store things that can easily melt on its shelves. Save this space for less delicate foods, such as nuts, alcohol, or frozen fruits.

Fridge and Freezer Organization [The Container Store]
The Best Way to Organize Your Freezer [The Kitchn]
8 Better Ways to Keep Your Freezer Super-Organized [Good Housekeeping]

Bring Fall Indoors With These Festive Wreath Tutorials

Who says that a wreath has to hang outside? There are a number of fun and creative ways to make DIY wreaths that bring the beauty of fall indoors, and many of them don’t cost a dime to make. Here are three great wreath tutorials for you to try this weekend at BLVD l Loudoun Station.

DIY Apple Wreath [thewoodgraincottage.com]
While an actual apple wreath would likely be too heavy to hang, this one uses faux apples from the craft store to achieve the same effect. All it takes is some hot glue, a Styrofoam wreath mold and some burlap to hang it.

Glitter Wreath [homemadebyjill.blogspot.com]
If you’re looking for a fun wreath project that the kids can do, too, this one is a great choice. They’ll enjoy cutting out the small leaves from heavy cardstock, and they’ll enjoy it even more once it’s time to sprinkle glitter all over.

Fall Wheat Sheave Wreath [bhg.com]
If you prefer something with a more natural look (and a quicker preparation), this tutorial is one of the simplest you’ll find. Simply gather some dried wheat and tie it together with a piece of oversized ribbon in a fall color, then attach the whole thing to your door (or anywhere else that can use a bit of decoration).

Pin It on Pinterest