Host Your Own At-Home Wine Tasting With These Pro Tips

Having a wine tasting in the comfort of your home is an inexpensive and simple way to find new wines you might love. Invite a few friends over, gather a group of bottles, a cork screw, and maybe some food to pair with the wine, and you’ll be good to go. Follow these simple tips to help host your next get together!

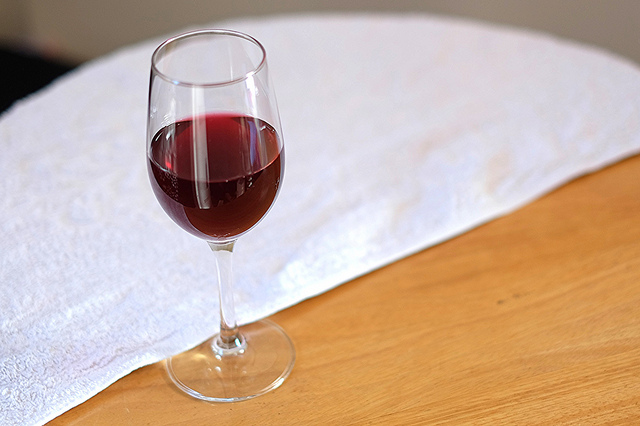
  • Gather a white tablecloth, big wine glasses, spittoons, crackers, and some coffee grounds to use as an odor neutralizer between wines.
  • Prepare your wines to their ideal temperatures. Serve white wines at around 50 degrees and red wines at around 60 degrees. Open the bottles at least 30 minutes before you plan on serving.
  • If you’re planning on serving a variety of different wines, be sure to start with the least refined and work your way to the most refined. You should always start with the lightest wine first.
  • Pour the glasses an inch below the equator, or the widest part of the glass.
  • Don’t rinse the glasses between servings, as water can dilute the wine.
  • After tasting all of the wines, discuss with your guests the aromas and tasting notes of them all and your likes and dislikes.
  • After listening to everyone’s thoughts, re-taste the wines to see whether they have changed with aeration.

How To Have The Perfect Wine Tasting At Home [The Huffington Post]
How to Host a Wine Tasting Party [Real Simple]
How to Host a Wine Tasting [Food & Wine]
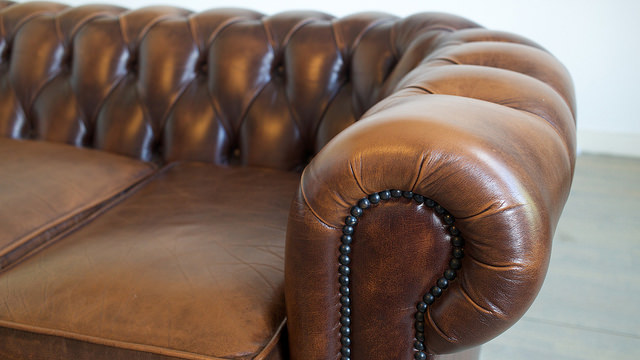
How to Take Your Couch From Furniture to Focal Point

Your couch is one of the most important pieces of furniture in your home. It provides a space to curl up and watch a movie, to catch up with a longtime friend, and even to share a meal during those weekend take-out nights. If you want to make your sofa more of a focal point, these smart tips will show you how.

  1. Update your throw pillows. The easiest way to take your sofa from basic to stylish is by adding fun, vibrant throw pillows. Choose a few in complimentary colors, mix and match patterns or even go with a geometric, black and white scheme for a hip, retro, look.
  2. Add a blanket. Take a tip from the pros and casually drape a throw across the ottoman or folded on the back of the sofa. Choose something that pairs well with the rest of the room’s color scheme, or go with a classic knit throw for a cozy feel.
  3. Switch up your rug. Choose a vibrant area rug that extends a few inches wider than your sofa, and make sure that it’s large enough to tuck under the sofa’s front legs.
  4. Add a gallery wall. Finally, create a designer-worthy gallery wall directly behind your sofa by framing your favorite family photos, wallpaper swatches, and art prints.

Before & After: How to Style Your Sofa [Elle Décor]
Style a Sofa 5 Different Ways [HGTV]
How To: Style A Sofa [Glitter Guide]

Fun DIYs to Give New Life to Unwanted Household Items

Instead of tossing out those household items that seemingly have no use anymore, give them new life by repurposing them into something useful. This not only helps you to save a bit of cash, it also helps to reduce your waste production and show a little love to our environment. Here are a few fun DIYs for making over unwanted household items!

  1. Turn empty condiment bottles into squeeze bottles for dispensing pancake batter. Just make sure you thoroughly clean them out first—no one wants to eat ketchup-flavored pancakes!
  2. Turn an ornate vintage picture frame into a vanity tray. Simply add a pretty fabric instead of a photo, lie it flat, and fill it with perfume bottles, makeup, and more.
  3. Clean the fine “hairs” out of corn on the cob by using a dry toothbrush that you don’t use anymore.
  4. Hang an old rake upside down and use it as a rustic necklace holder.
  5. Portion toddler snacks perfectly by filling the cubes in an ice cube tray. They are the perfect size for berries, pretzels, cheese cubes, and chocolate candies.
  6. Purchase a vintage window shutter from a garage sale or thrift store and use it to display important memos, mail, and photographs. Simply clip wooden clothespins along the slats and even add S-shaped hooks for keys.

50 All-Time Favorite New Uses for Old Things [RealSimple]
6 New Uses for Old Things [Country Living]
25 New Ways to Use Your Old Stuff [HGTV]

3 Interior Decorator Secrets Everyone Should Know

So you’re not an interior decorator by trade? No sweat! When it comes to decorating your rental, all it takes are a few tricks from the professionals to make your home look like it belongs on the pages of a design magazine. Here are a few secrets that interior decorators don’t mind sharing.

  1. Arrange furniture in the way that makes the most sense. If you’re constantly tripping over furniture or struggling to reach things on shelves, you likely don’t have your room arranged in the most functional way. Don’t be afraid to rearrange the room until it works — or even to get rid of pieces that you don’t really need.
  2. Add good lighting. If you’re lucky enough to have lots of windows in your apartment, play up the natural light with sheer curtains or neutral-colored blinds. If you don’t have much natural light, fake it with daylight-imitating light bulbs.
  3. Use light or neutral colors. Choose furnishings in light or neutral colors to create an airy, open feeling.
  4. Add art. Adding framed art to every wall is a great way to decorate your apartment without taking up precious space. Create an eclectic gallery wall or add a series of three large frames to create the illusion of depth. Don't forget to add mirrors!

11 Foolproof Decorating Tips [This Old House]
20 Decorating Secrets [House Beautiful]
9 Interior Decorator Secrets [Woman’s Day]

Have a Penchant for Color? Here’s What Your Home’s Decor Says About You!

Whether you love the chic, soothing touch of relaxing neutral shades or you're partial to bright, bold pops of color, your home’s color scheme says a lot about your personality. Use this guide to find out exactly what your color choices mean for your lifestyle.

  • Orange. If you notice a lot of bright bursts of orange throughout your living space, it means that you’re confident and expressive. Orange expands your mindset and fosters creativity.
  • Pink. Pink is the color of romance and sensitivity, which makes it a perfect choice for a bedroom or a warm, cozy living room.
  • Blue. If you’re partial to blue, it likely means that you’re organized and driven. This color helps to limit clutter and encourages deep thinking.
  • Green. The color green is often related to money, but it is also the color most commonly found in nature. People who are partial to green are likely in tune with life’s riches, both physical and emotional.
  • Red. Red is one of the most stimulating colors, and it is often attributed to people who are self-confident and fearless.
  • Yellow. Those who prefer yellow in the home are deeply intelligent and conversational. This color helps to enhance positive thinking.
  • White. Often associated with freshness and simplicity, white is perfect for those who view their home as a respite from the outside world.

How to Fix Your House with Color [House Beautiful]
Color Meanings [Interior Designpedia]
Room Color and How it Affects Your Mood [Freshome]

How to Style an Apartment Entryway Like the Pros

If you want to create a stylish entryway in your rental home, there are a number of smart, design-savvy ways to use furniture to achieve the look you love. Here are a few tips from the pros that will help you to style an entryway like you see in the design magazines.

  1. Begin with a surface. To create a separated entryway, you’ll need to use some type of table as a focal point. Measure your space and invest in a side table, credenza, sofa table, or even a bench in a size that fits the area.
  2. Add storage. A good entryway has a place for everything: your keys, shoes, coat, and all of the things you find when you empty your pockets. Add a low bench or bin for shoes, a few simple hooks, and a tray to corral any loose items.
  3. Place a mirror. A mirror is especially helpful for those last-minute checks before you dash out the door. Place one directly above your table, or stagger it next to a matching frame.
  4. Finish with a small rug. To tie everything together, add a long runner-style rug or a small doormat, depending on your space. Don’t be afraid to use color here, especially if the rest of your color scheme is fairly simple.

How to Style an Entryway [The Everygirl]
Small Apartment Entryway [Pinterest]
21 Ways to Enhance an Entryway [Real Simple]

Keep Your Home Office Squeaky-Clean (and Germ-Free) With These Handy Tips

Is your home office one of the messiest spaces in your rental home? Here are some easy ways to clean your gadgets and electronics — and keep your office tidy and germ-free.

  1. Start by organizing your pesky wires and cords. This will help prevent fire hazards and eliminate the unattractive mess.Invest in some sturdy clips from office supply stores to keep them neatly wound.
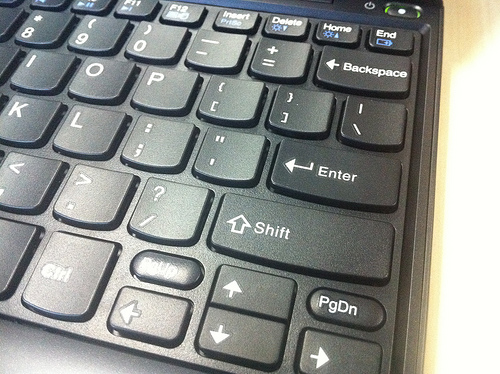
  2. Clean your keyboard. You can’t exactly spray your keyboard with disinfectant, but you can clean it by unplugging it and shaking out the loose dirt. Use canned, compressed air to remove the rest of the dust from between the keys, then give it a wipe-down with a cloth dampened with cleaner.
  3. Wipe off your computer screen. Use a bit of water and a lint-free cloth. Don’t use cleaner, as it may damage the screen.
  4. Disinfect your cell phone or landline phone. Do this regularly, as the germs from your mouth spread very easily. Use a disinfectant wipe all over the phone, being careful that no drips get inside of the phone itself.
  5. Dust. If you have allergies, be sure to dust shelves, floors, and your desk regularly to prevent dust particles from infiltrating your home office.

How to Keep Home Office Equipment Clean [HGTV]
Step-By-Step: Keep a Clean Keyboard [PCWorld]
How To Clean Your Filthy Gadgets [Gizmodo]

Planning a Vacation? Here’s How to Pack Lighter and More Efficiently!

You want to be prepared for everything from a fancy dinner to an afternoon of snorkeling on your upcoming vacation, but so many different activities on your itinerary may make packing your suitcase seem very daunting. Here are four simple ways to pack your suitcase a bit lighter on your next big trip.

  1. Become familiar with the laundry service. Sure, no one wants to do laundry on a vacation, but it’s much more enjoyable than breaking your back from lugging around an impossibly heavy suitcase or backpack. Look up your hotel or hostel’s laundry amenities beforehand, and if there are none, check for the closest laundromat.
  2. Take full advantage of the carry-on. Many travelers are intimidated by the carry-on because of airlines’ strict weight limits, but this smaller bag is a very underutilized space for extra clothes. Just weigh your bag as you pack to avoid paying extra baggage fees.
  3. Mix and match. By packing clothes in neutral shades that can easily coordinate with one another, you cut down on the need to pack separate outfits for each day.
  4. Cut down on shoes. Shoes obviously take up the most space in your suitcase, so be sure to only pack ones that you really need. After all, do you really need stiletto heels on a backpacking trip?

Packing Smart and Traveling Light [Rick Steves]
The Carry-On Challenge: How to Pack Light Every Time [Independent Traveler]
How to Pack Light: 9 Tips to Lighten Your Load [Huffington Post]

Speed Through Laundry Day With These 4 Organization Tips

You love the fresh, clean feeling of having all of your laundry done, but getting there is a whole different story. Laundry day may be time-consuming, but there are ways to make it easier. Here are a few tips to help you organize your laundry and get it done in half the time.

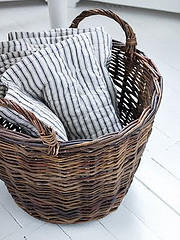
  1. Sort laundry without even trying. It takes a lot of time to sort through your mountain of dirty clothes and separate the lights from the darks. Invest in a three-compartment hamper to do the sorting for you.
  2. Bleach more effectively. Bleaching seems like a fool-proof way to remove stains from white clothing, but it doesn’t always work as effectively as you’d like. The proper way to bleach clothes is by first letting the clothing soak in a pool of water. Add one cup of bleach and one cup of dishwashing detergent and let it soak for about half an hour. Finally, dump the whole thing into the washing machine and wash as you normally would.
  3. Prevent damage. To reduce fading, turn dark colored items inside out before washing. Use the cold water setting to prevent clothes from shrinking, and then hang them to dry instead of using the dryer. Also, only wash delicates, like bras and underwear, in a lingerie bag on the delicate cycle.
  4. Invest in a drying rack. Rather than tossing delicate items over the shower curtain rod or rigging some other kind of makeshift drying rack, invest in the real deal. They're usually inexpensive, and they fold into a flat shape to tuck away when not in use.

10 Tips and Tricks for Easier Laundry Days [Yahoo!]
Easy Laundry Tips [The Nest]
How to Do Laundry More Effectively [Babble]
13 Ways to Make Laundry Day Easier [BHG]

Did You Know That You Can Safely Wash These Dry-Clean Items at Home?

That pesky “Dry Clean Only” label on your new favorite sweater or dress may seem ominous, and it might even make you less likely to wear these hard-to-clean pieces. However, there are a number of smart ways to cheat the system and wash fabrics like washable silk, solid-colored cotton, wool and linen at home. These tips will show you how.

  1. Check the label. The best way to tell if you can wash a garment at home is to read the label. If it recommends dry cleaning, it’s safe to proceed at home. If it says the dreaded “Dry Clean Only,” however, it’s probably smarter to take it to the pros.
  2. Gently wash. Once you’ve decided that your item is safe to wash at home, fill the sink with lukewarm water and a few drops of gentle detergent. Gingerly swish the item around for around 5 minutes, and be sure to avoid scrubbing or rubbing together.
  3. Rinse (equally gently). Next, rinse the garment completely with more lukewarm water, making sure to get all of the detergent out. Squeeze the water out before drying, but avoid harshly wringing the fabric.
  4. Dry with a towel. Lay the garment flat on a clean towel, then roll it up and squeeze out the extra moisture. Spread it out again on another clean towel and let it sit until completely dry.

Do I Really Have to Dry Clean This? [Real Simple]
Do You Need to Dry Clean? [Reader’s Digest]
What You Should (And Shouldn’t) Dry Clean [Care2]

Pin It on Pinterest