Tackle Tough Stains With These Expert Tips

It's common knowledge that the longer a stain remains, the more difficult it is to remove. Whether it’s spilled coffee, wine, or barbecue sauce, it's still possible to save your clothes or carpet. Follow these tips on how to tackle tough stains.

  • Time is of the essence. If you’re not near a washing machine, pre-treat the area using a portable stain pen or wipe. If you don’t have these on hand, trying using an ice cube to wet the spot.
  • Wait before drying. After washing your item, check that the stain is gone before putting it in the dryer. The heat from the dryer can make the stain permanent.
  • Blot your stain gently. Rubbing the stain will just make it worse.
  • Choose your tactic.
    • For ketchup or barbecue sauce stains, rinse with cold water first, then launder in cold water.
    • For fruit, juice, or wine stains, launder with detergent in warm water. Do not use bar soap, as soap-based products could make your stain permanent.
    • For stubborn stains like grass, soak the area in a solution of cool water and a laundry product such as Shout for at least 30 minutes. If the stains are still visible, soak for an additional 30 minutes and then wash again.

How To Get Stains Out Of Clothes Like A Boss [She Knows]
How to Remove Stains [Esquire]
Stain Removal Tricks and Shortcuts [Real Simple]
Stain Removal Chart [American Cleaning Institute]
How to Keep Your Fridge at Ladera Clean and Fresh

Looking for easy ways to help keep your refrigerator clean and fresh? These smart and simple household items will help you to get out even the toughest food smells and leave your fridge smelling like new again!

  • Baking soda. This one isn’t just an old wives’ tale; baking soda really does help to absorb unpleasant scents and remove them from the air. Start by sprinkling some baking soda around your refrigerator and scrubbing with a damp sponge. Once you’re done, place an opened box inside to absorb any additional smells that might happen in the future.
  • Lemons. Lemons are also all-natural deodorizers. Soak a cotton ball in a small bowl of lemon juice, and then leave it inside the refrigerator for several hours to permeate every inch of the interior.
  • Salt. Scrub the inside of your fridge with a simple salt and water solution, leaving the coarse granules for extra scrubbing power. This is a great way to do a heavy-duty clean without chemicals.
  • Liners. If you frequently find yourself scrubbing foul-smelling spills from condiments, leftovers, and other unsavory items, you might want to try lining the shelves of your fridge with paper towels. That way, you can simply remove them if (and when) a leak happens.

Clean and Deodorize Your Refrigerator [Reader’s Digest]
How To Clean & Organize a Refrigerator [Apartment Therapy]
Cleaning Your Fridge [Martha Stewart]

Clever Ways to Keep Your Cleaning Supplies Neat and Tidy

Make cleaning less of a hassle by organizing your supplies. A neat and clean supply area will save you time and make you more motivated to clean. Follow these simple, clever tips to make your chores a little easier to tackle!

  • Use a cart with wheels to store all of your supplies. You can move all of your products from room to room as you go.
  • Free up your shelves by using a hanging shoe organizer to store your spray bottles, wipes, and cleaners.
  • Buy a few plastic tubs for each room of your apartment and label them to make it easier to sort through what you need for each room.
  • Get more use out of the space under your sink by using a tension rod. The handles of spray bottles sit perfectly on top of the rod, freeing up more space for other supplies.
  • Use hooks to hang your brooms to keep them from falling out every time you open your closet door.
  • Make it easier to find your supplies by placing them on a Lazy Susan underneath your sink. The spinning turntable keeps all of your items easy to grab and within reach.

10 Ways to Organize All of Your Cleaning Supplies [Good Housekeeping]
Clever Solutions for Under-Kitchen-Sink Storage [House Logic]
Stylish Storage: 10 Ways To Organize Under Your Sink [Apartment Therapy]

How to Speed Through Household Cleaning Tasks

Whether you’re pressed for time before dinner guests arrive or simply overwhelmed with the amount of items on your to-do list, just about everyone could use some help when it comes to cleaning. Here are a few smart ways to help you speed through household cleaning tasks.

  • Work in a circle. Instead of attacking things in each room at random, make a plan to work in a circle. In the kitchen, that might mean wiping down the refrigerator and tossing out expired foods, giving the stove a good scrub, wiping down counter and tabletops, then loading the dishwasher last.
  • Start with the worst first. If you dread cleaning the bathroom or tidying up the bedroom, start with that room first. By getting the hardest part out of the way when you have the most energy, you’ll speed through the rest of your chores.
  • Take inventory while cleaning. If you notice that something doesn’t need to be cleaned, such as the already-spotless windows, then eliminate it from the list to save time. Unless it’s something requiring sanitization, like the toilet, there’s no shame in leaving it be.
  • Do a final sweep. Once you’re done with the major cleaning tasks, give your home a final sweep, putting everything in its right place and creating an organized look.

Speed Cleaning [The Inspired Room]
30 Quick and Easy Cleaning Tips [Woman’s Day]
9 Tips For Speed Cleaning [About Home]
Clean Your Home in Less than 20 Minutes [SheKnows]

How to Design Your Own Floral Arrangement

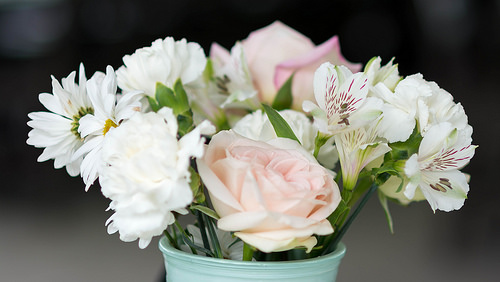
Think that you have to visit a professional florist to find a magazine-worthy arrangement? Think again! With these simple tips for designing your own floral arrangements at home, you can fill your space at Ladera Apartment Homes with gorgeous flowers or even give them as affordable gifts to friends.

  1. Choose the perfect vase. Choose a vase that will fit the flowers that you have on hand, or if you don’t have a designated vase, use something like a mason jar, pitcher, or other household vessel.
  2. Using florist’s tape, create a grid across the top opening of the vase. Leave approximately one-inch squares in between the tape to keep the flowers separated and evenly spaced.
  3. Mix up textures by using a wide variety of different types of flowers. Contrast delicate baby’s breath with big, leafy blooms and eucalyptus branches.
  4. If you’re feeling a bit intimidated by the idea of mixing and matching, make a statement by using a large quantity of just one type of flower. Whether it’s classic red roses or purple hydrangeas, all flowers look beautiful when trimmed into layered lengths that eventually create a rounded arrangement in a short vase.

Flower Arranging 101 [Martha Stewart]
Elegant, Exquisite, Easy Flower Arrangements [Real Simple]
How to create perfect floral arrangements [Sunset]

5 Unexpected Household Uses for Mayonnaise

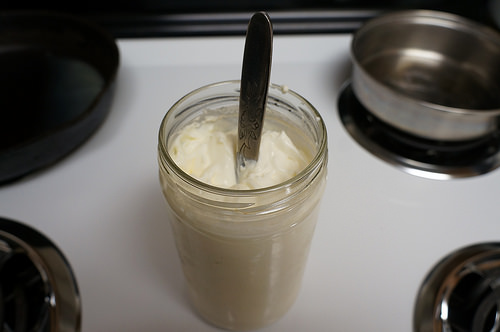
Even if mayonnaise isn’t your favorite sandwich topper, you can’t deny that these unique uses for the condiment are downright brilliant! Try one of these new uses for mayonnaise in your home, your car, or even the shower.

  1. Fix cracks in wood furniture by simply dabbing mayonnaise all over the top, and then using a clean rag to wipe the entire surface. The mayo will stay inside of the crack, and after a few days, its oils will swell the wood and help close the cracked part.
  2. Create a DIY deep hair conditioner by applying mayo all over your head. Concentrate on the drier parts at the ends and work your way up to the roots, and then leave it on for at least five minutes. When you rinse, you’ll be left with smooth, soft locks.
  3. Remove the frustrating residue left behind by stickers and other adhesives. Simply rub the spot with mayo and a smooth, dry towel.
  4. Clean up crayon marks from walls and wood floors by rubbing mayonnaise on the affected area and letting it soak in for a few minutes. Wipe it away with a damp towel and you’ll wipe away the crayon as well.
  5. Get gum out of your (or your kids’) hair by rubbing the gum with mayonnaise. Once it’s worked in, simply slide the gum down the strands.

10 Unexpected Home Uses for Mayonnaise [Wise Bread]
9 Surprising Uses for Mayonnaise [Rachel Ray Everyday]
11 Home and Beauty Uses for Mayonnaise [Reader’s Digest]

Spruce Up Your Space With These DIY Holiday Crafts

Instead of splurging on holiday decorations from those pricey home décor stores, make your own seasonal crafts for next to nothing. Here are three holiday craft ideas that will give you a bit of extra money to spend on gifts for your loved ones.

Magazine Trees
Take an old magazine and fold it over page by page to create fan-like holiday trees with a bit of a vintage look. Once you’re done, you can even decorate the trees with tinsel and ornaments. Display them along a mantle or up the stairwell.

3D Paper Snowflakes
If you’re decorating for a holiday party at home, these 3D paper snowflakes are a fun and easy craft that you can make in bulk. Use silver or gold paper for a metallic look, or simply use white computer paper to create a whole flurry of realistic snowflakes.

Ornament-Filled Vases
If you have some leftover ornaments that didn’t fit on the holiday tree, don’t let them go to waste. Instead, create a festive centerpiece or an accent for the mantle by placing them inside of a cheap, clear vase. Add some tall branches behind the ornaments and place the whole thing somewhere that all of your guests can see.

How to Host a Successful Toy Swap With Your Friends, Family and Neighbors

If your children are too old for their current toys but you can’t bear to simply toss them out, you may be interested in hosting a toy swap with fellow parents. A toy swap enables you to swap your child’s old or unused toys with those of other children, bringing home a whole new haul of toys without spending a penny. Here are a few tips to help you pull off a successful toy swap.

  1. Create a list of guests. Try to pick guests who you feel comfortable with, who have children in varying ages, and who live fairly close to one another.
  2. Choose the perfect location. Because of the group of people and the large amount of toys, you’ll need to hold the swap in a large, fairly spacious room. If you don’t have this type of space in your own home, see if someone else would be willing to lend their living room.
  3. Send out invitations and guidelines. Emailing invitations seems to be the most convenient way to get the word out, so include a list of guidelines for the swap at that time. Describe what types of toys to bring, if they should be cleaned beforehand, how many toys to bring, and if there are any items that you won’t accept.
  4. Make it fun. Set out snacks, make sure everyone understands the rules, and keep things light-hearted!

How To Organize a Toy Swap or Toy Exchange [About Parenting]
How to Host a Toy Swap [30 Handmade Days]
How to Throw a Toy Exchange [Shareable]

Cool and Creative Uses for Plastic Bags

While you try to recycle everything that you can, you might still feel guilty about just how many plastic bags that you get from the grocery store each week. Instead of tossing them in the recycling bin, try one of these fun and creative tips for making something new out of your old plastic bags.

  • Use old scrap fabric and a few plastic bags to create a cute crinkle toy. Simply sew the fabric into a square pouch, bunch up a few plastic bags inside and sew it shut for a fun toy that makes a noisy crinkling sound.
  • Make plastic “plarn” for crocheting by slicing a plastic bag into strips lengthwise, taking care to keep the strips in loops. Simply loop the two together using a slipknot to create a long string of plastic yarn that you can use for crocheting placemats, rugs or coasters.
  • Make a jump rope by cutting a bag into six strips, then braiding those strips together like you would a friendship bracelet. Do the same with another six strips, then twist the two braids together into one long, sturdy rope. Wrap the ends in duct tape to create handles, then get outside and enjoy your new jump rope.
  • If crafting isn’t really your thing, you can always gather your old plastic bags and return them to the store that you got them from.

10 Uses for Plastic Bags [This Old House]
16 Ways to Reuse Plastic Bags [Care 2]
Designer MacGyver: 5 Clever Plastic Bag Crafts [HGTV]

Plan Your Dream Wedding With Help From These Two Websites

The wedding-planning process is an exciting time in the life of any bride or groom, but it can difficult to know exactly where to start. Whether you're planning backyard nuptials or an elaborate affair on a tropical island, these two image-heavy websites can help point you in the direction of your dream wedding.

Style Me Pretty
Arguably the most popular wedding blog out there, Style Me Pretty posts user-submitted photos from newlyweds. Each post tells the story of the bride's day through beautiful photos, which are supplemented with wedding planning advice and tips from the bride.

Once Wed
Similar to Style Me Pretty, Once Wed is eye candy for brides-to-be. Ooh and aah over images of real brides' gowns, bouquet, and shoes, then scroll down to learn how she coordinated her bridal party, decorated her tablescapes, and decided upon invitations. Borrow some of her ideas for your own wedding.

Pin It on Pinterest