Update Basic Magnets and Pushpins WIth These Fun Tutorials

Who says office supplies have to be boring? Here are a few crafty ways to transform your basic pushpins and magnets into something eye-catching, playful, and perhaps a bit chic.

Bottle Cap Magnets and Thumbtacks [marthastewart.com]
Start saving up those used bottle caps, because you’re certainly going to want to try this adorable DIY project from Martha Stewart. Simply glue a small photo inside of each bottlecap, then use contact cement to attach them to the magnets and pushpins and create a tiny photo gallery.

DIY Gold Magnetic Letters [inspiredbycharm.com]
If you loved making silly words and phrases from those colorful magnetic letters as a kid, you’ll enjoy this chic, updated version just as much. Just cover those childish magnets with luxe gold spray paint for a modern, updated look.

Washi Tape Clothespins [designertrapped.com]
By covering affordable wooden clothespins with different types of colorful washi tape, you can create this fun project in less than an hour. Add adhesive magnets to the backs of each clothespin to use them on the refrigerator, or line them up on a wire to hang photos from a wall.

Check Out These Creative Uses for Wallpaper

If the thought of adding wallpaper to your home makes you cringe, you may want to rethink your opinions on this seemingly outdated wall covering. There are a number of creative uses for wallpaper that have nothing to do with your walls, and don’t worry: there’s no outdated paisley print here.

  1. Line a bookcase. If you have a hand-me-down bookcase that’s a bit of an eyesore, dress it up with a fun, colorful wallpaper backdrop. Simply remove the shelves and stick on a solid or printed wallpaper that goes with the rest of the room’s decor.
  2. Line drawers. Instead of lining your drawers with plain old drawer liners, get a bit more creative by lining them with leftover wallpaper.
  3. Dress up a dresser. Cover an entire dresser, the sides, or just the drawer fronts to bring a bit of color and a pop of pattern to your bedroom.
  4. Transform tray tables. If you want to add chic side tables to your living room but you’re on a bit of a budget, make over affordable tray tables using wallpaper. Simply stick the wallpaper to the tops of the tables, then create an attractive vignette using books, a lamp, or a few romantic candles.
  5. Frame it. If you have a very small amount of wallpaper that you love, turn it into a piece of DIY art using a simple, store-bought frame.

12 "Off the Wall" Places to Put Wallpaper [Bob Vila]
Unexpected Uses for Leftover Wallpaper [Real Simple]
9 Unexpected Ways to Decorate With Wallpaper [Good Housekeeping]

How to Decorate Your Home With Tapestries

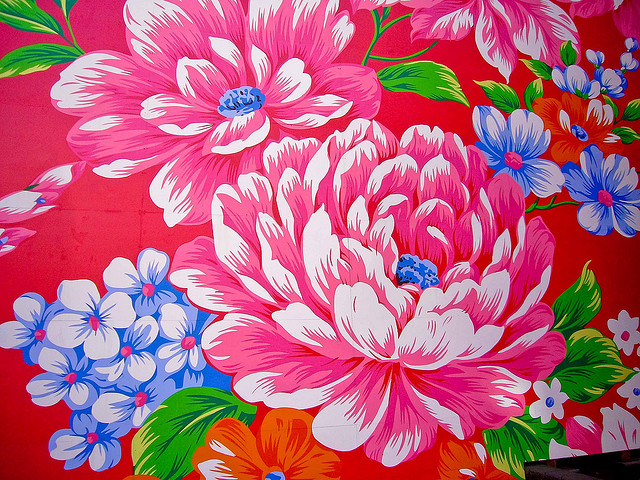
While tapestries may remind you of your college dorm room, newer versions of these eclectic wall hangings are anything but frumpy. Updated tapestries are chic and modern, and they can be used throughout your home in a number of different ways. Here are just a few great ways to temporarily change up your wall color by using large tapestries.

  • Use a tapestry as a focal point. The first thing you should remember when decorating with a tapestry is that it will instantly become the focal point of the room. That means that should anchor it behind the headboard of your bed, as the backdrop of your sofa or on a bare wall in the hallway so that it doesn’t overpower the room.
  • Choose a complementary color scheme. No matter how wild and crazy your tapestry, you want to make sure that the colors used throughout pair well with the rest of your room.
  • Drape it over furniture. If you don’t want to hang it on the wall, you can drape your tapestry over an old armchair or small futon to breathe new life into its tired upholstery.
  • Hang it from the ceiling. For an even more unique effect, secure your tapestry to the ceiling and leave the rest of the walls blank.

How to Decorate With Tapestries [SF Gate]
Chic Room Divider [Martha Stewart]
decorate and wear: tapestry [Mr. Kate]

Knife Techniques and Tips Every Home Cook Should Master

Kitchen knives are a necessity for just about any type of cooking, but they can also be quite dangerous if used incorrectly. By learning the proper knife techniques, you can master the art of chopping, dicing, and slicing without risking injury.

  1. Start with a clean knife. Although you may think that cuts are the only dangers caused my knives, bacteria is also incredibly hazardous to your health. Be sure to clean your knife with hot water and dishwashing soap before using.
  2. Keep knives sharp. In order to guarantee fast, accurate cuts with minimal effort, you'll need to keep your knives sharp. You can do this by using a sharpening stone or by taking your knives to the store where you purchased them for sharpening.
  3. Learn to chop. Chopping involves roughly cutting a food item into pieces, and it is likely the most common cutting technique. To properly chop something, grip the knife securely and place either the knife's tip or the corner closest to your hand firmly against the cutting board. Use your wrist as a fulcrum to pull the rest of the knife up and down, keeping that end against the cutting board the whole time.
  4. Research other techniques. Dicing involves cutting into small, uniform pieces, while a chiffonade is how you properly cut herbs. You should also practice peeling things like apples or potatoes with a sharp knife.

Knife Skills: Different Types of Cuts [The Culinary Cook]
Top 10 Knife Skills [How Stuff Works]
Perfect Your Knife Skills With This Chef's Guide to Knives [Lifehacker]

How to Choose the Right Throw Pillows for Your Home’s Decor

Incorporating throw pillows into your bedroom or living room is a cheap and easy way to update a home’s decor, but with the overwhelming number of options, it may be intimidating to choose the perfect ones. Here are a few tips to help you choose the best throw pillows for your space.

  1. Consider the size. Are you purchasing throw pillows for a standard-sized couch or your king-sized bed? The size of the space makes a big difference when choosing the perfect pillows, so be sure to consider sizes before purchasing. Eighteen-inch square pillows are best suited for a bed or sofa, while oversized pillows of 24 inches or larger create a more lounge-style feel in a living room.
  2. Choose a color scheme. Black and white throw pillows create a mod effect, while bright shades of pink, green, or blue liven up a drab space. Even if you plan on purchasing patterned pillows, stick with one singular color scheme for a designer-worthy look.
  3. Don’t be afraid to mix and match. Get creative by mixing and matching different sizes, shapes, and patterns. If you stick to your chosen color scheme, it’s easy to pull off a more eclectic look.
  4. Add pillows in unexpected places. Toss some large, cushion-style pillows on the floor, add some in a window nook, or place one on a desk chair for a cozy feel.

Decorating With Throw Pillows [Real Simple]
Tips On Choosing Throw Pillows [Décor Love]
How to Choose Decorative Pillows for the Living Room [Overstock]

Love to Cook? Master These Must-Know Knife Techniques

If you love to cook, you know how important it is to use the proper cutting techniques in every recipe. Many people don't know the proper names of these techniques, however, which often leads to using the wrong one. Here are three important types of cutting that are essential for everything from entrees to desserts.

  1. Julienne. To julienne, you want to cut vegetables or other food items into stick-shaped pieces that are long and thin. Start by cutting the item into a square, then slice it into rectangular-shaped pieces lengthwise. Repeat the same step on each of the rectangles until you're left with pieces that resemble matchsticks.
  2. Chiffonade. This type of cut sounds fancy, but it actually just refers to cutting herbs or thin leaf vegetables. Roll the herbs up into a tight tube, then roughly chop across with a sharp knife. It doesn't matter how the cuts look, just that the pieces are small enough to sprinkle throughout a dish.
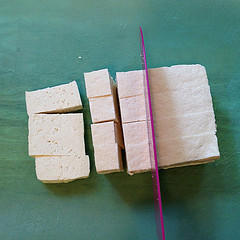
  3. Dice. Dicing is similar to chopping, but it creates entirely uniform pieces for dishes like stews or fruit salads. Begin with a rectangular shape and continue to cut it both directions until you're left with uniform pieces in the size that you desire.

Knife Skills: Different Types of Cuts [The Culinary Cook]
Top 10 Knife Skills [How Stuff Works]
Perfect Your Knife Skills With This Chef's Guide to Knives [Lifehacker]

Pin It on Pinterest