Crafty DIY Projects That Every Cook Can Use in The Kitchen

Picture the kitchen of your dreams. Is it neat and organized? Stylish and chic? Or perhaps it's a combination of all the above! Either way, these do-it-yourself projects can help you add storage and personality to your kitchen!

Copper Paper Towel Holder [almostmakesperfect.com]
Love modern design? If so, this copper paper towel holder will add some modern style to your cooking area. The end result may look expensive, but the materials are very affordable — and it's easy to make!

Tiered Fruit Basket
Display fruits and vegetables without taking up counter space by making this three-tiered hanging fruit basket. Its sturdy chains make it able to hold a good deal of weight, while its wooden bases create flat surfaces for your produce to rest upon. [alwaysrooney.com]

Stitched Hot Pads [purlsoho.com]
Whether you're looking to add a pop of color to your kitchen or to add to your collection of textiles, these adorable stitched hot pads are the perfect project. Even the most novice crafter can easily stitch together the fabric scraps used for these hot pads, and by mixing and matching fabrics, you can create a whimsical look that's sure to bring some big style to your space.
How to Keep Fruit Fresher Longer

Are you guilty of buying fresh produce only to have it spoil a few days later? You're not alone: Studies have found that Americans throw away a fourth of all the produce they buy! Here are some tips to help keep your fruits fresh as long as possible.

  • Fruits such as avocados, tomatoes, mangoes, melons, apples, and pears will ripen quicker if they’re left sitting out on your countertop.
  • Keep your other fruits away from bananas. They emit gases that will speed the ripening of any fruits that are nearby.
  • Fruits such as grapes, citrus, and berries should always be refrigerated.
  • Refrain from washing berries until you are ready to eat them. You want to store them in a dry and covered container.
  • To extend the freshness of lemons, limes, oranges, and grapefruit, store them in your crisper drawer or in a mesh bag in your refrigerator.
  • Once fruits are fully ripe, you can refrigerate them to help them last a little longer. However, for the best flavor, you want to return them to room temperature.
  • One of the worst things you could do for a fruit is to store it in an airtight bag. The lack of air flow speeds up decay.

The Kitchn's Guide to Storing Fruits and Vegetables [The Kitchn]
Keep Fruits & Vegetables Fresher Longer [American Heart Association]
Spoiled Rotten – How to Store Fruits and Vegetables [Vegetarian Times]

Damage-Free Ways to Display Wall Decor at Marquis at Katy

When you live in a rental, you want to leave behind as little damage as possible to keep the unit in top shape (and insure that ever-important security deposit). In many cases, that means finding new and creative ways to hang posters, paintings, and other wall decor without taking a hammer to the walls. Here are just a few ideas for creating damage-free wall displays.

  • Use Command strips. These handy tools from the trusted 3M brand are lifesavers for many renters. Simply stick the sturdy adhesive back to your frame, stick the other side to the wall and attach the two with the equally strong Velcro strips. When it comes time to move out, they simply peel off the wall without leaving any residue behind.
  • Try monkey hooks. Monkey hooks are complicated looking metal hooks that are actually quite simple. The slim, curved devices have long ends that push into the wall and create a hole not much larger than a pinpoint, and then they push back out of the wall to create a loop that can hold frames weighing up to 50 pounds.
  • Stick on poster putty. For lightweight wall hangings without frames, tried-and-true poster putty is always a safe bet. Simply tack on small dots of this unobtrusive putty to hang posters without nails or tacks showing through—or damaging your walls.

How to hang a picture without hammer and nails [SheKnows]
Hang Pictures on a Wall [Lowe’s]
How to Hang Pictures Without Destroying Your Walls [Lifehacker]
How To: Hang a Frame Without Leaving a Mark [Apartment Therapy]

Pro Tips for Keeping Your Bedroom Neat and Organized

​Even if you’re not a particularly neat person by nature, it’s important to keep your bedroom organized in order to promote a better night’s sleep and help you to get ready faster in the mornings. Here are a few smart tips from the pros that will show you how to make your bedroom look neat and tidy by bedtime tonight.

  1. Clear out anything that isn’t meant to be there. Many people fall into a habit of dragging unused belongings into the bedroom (or the bedroom closet), and putting them in their rightful places will leave you with a blank slate.
  2. Take a peek into your closet and consider the storage options. Add additional shelving, drawers or storage bins to make your closet work better for you—and your wardrobe.
  3. Invest in a hamper. If you don’t already have a designated space for your dirty laundry that you can easily reach for, get one. In fact, get two hampers so that you can separate your lights and darks as soon as you take off your dirty clothes.
  4. Minimize furniture. Most people have far too much furniture in their bedrooms, so get rid of anything that you don’t actually need. You’ll be amazed at how much extra space you have!
  5. Make the bed. This is one of the quickest and simplest things that you can do to create the illusion of an organized bedroom.

7 Tips to Keep Your Bedroom Clean and Organized [Eversave]
Achieve Better Sleep: 7 Tips for a Cleaner and Healthier Bedroom [HuffPost Healthy Living]
Tips for an Organized Bedroom [One Good Thing]

How to Add Organic Touch to Your Home’s Decor

Going organic doesn’t end at the grocery store. In fact, there are a number of different ways that you can incorporate organic elements throughout your entire home. Here are just a few great ways to add a natural touch to the decor in your living space.

  • Create a nature-inspired vignette. If you admire something beautiful on your morning walk, such as a unique branch or a particularly interesting stone, add it to a stack of books on a tabletop to create a flawless vignette.
  • Create stone hot pads. Glue smooth, flat stones to the surface of simple kitchen hot pads to keep your countertops protected from hot pots and pans.
  • Choose natural rugs. Soft, organic materials like jute and hemp look beautiful when woven into a rug, and they’re much friendlier on the environment than synthetic versions.
  • Create organic centerpieces. The next time you host a dinner party, fill a ceramic vase with foraged tree branches or add pine cones to a clear bowl for a unique centerpiece inspired by the outdoors.
  • Change up your drapes. One of the simplest ways to bring the outdoors in is by allowing as much natural light as possible into your home. Switch out heavy drapes with soft, sheer panels to maximize the light.

Decorating with Natural Elements [Better Homes & Gardens]
10 Simple Ways to Bring the Outdoors Inside [Freshome]
Decorating with Natural Elements from Natural Kitchen and Home [Pinterest]

Laundry and Clothing Care Basics Everyone Should Know

Doing the laundry is a necessary annoyance, but modern amenities have done a lot to make this weekly chore a less daunting. Here are the basic rules for properly washing and caring for your most essential articles of clothing.

  1. Sort by color. You’ve likely heard that you need to separate your lights from your darks, but this step is especially important when washing denim or new clothes that have yet to be washed.
  2. Use the right water temperature. As a general rule, wash delicate clothing that could shrink or bleed in cold water. For heavily soiled items, whites, and towels, use hot water instead.
  3. Use the proper detergent. Not all detergents are created equal, so choose a type specially formulated for cold water, hot water, or even a brand made with color-safe bleach to remove stains from colored clothing. As a bonus, using the right type of detergent can even extend the lifespan of your clothes.
  4. Secure buttons. Dab a bit of clear nail polish in the center of shirt buttons to help prevent them from loosening. Even better, learn how to replace one yourself if you frequently wear button-down shirts.
  5. Keep zippers smooth. Rub zippers with wax every few weeks to keep them from catching or sticking.

Laundry Basics – Sorting it Out [For Better Living]
How to Care for Your Clothes [How Stuff Works]
Keep Your Clothes Clean and Bright [She Knows]
4 Clothing Care Skills Millennials Probably Don’t Know (But Need to Learn) [Real Simple]

Easy Tips for Tackling Even the Toughest Stains

When you spill red wine on your favorite shirt or get a grease stain on your jeans, it may seem impossible to get your clothes to look normal again. There is a way to remove just about every stain, provided that you know these simple techniques.

  1. Tackle it quickly. Never let a stain set into your clothes, even if you’re away from home when it happens. Pre-treat the affected area with a stain remover, and be sure to toss a portable version in your purse or glove compartment.
  2. Know the types. Dye stains such as coffee, tea, or ink are the easiest to remove, and simply require running the stain under cold water and then washing in hot water. Protein stains like sweat or blood need to be treated with an alkaline stain-removal solution, while stains caused by lipstick, ketchup, and crayons require a combination of the other two treatments.
  3. Take care of delicates. If you stain delicate articles of clothing, don’t fret. Simply rub the stain with a solution of equal parts salt and lemon juice using a soft cloth or your finger to loosen the stain without damaging the fabric. Let it dry in the sun and it should look as good as new.

Stain Removal Smarts [She Knows]
How to Remove Stains [Esquire]
Stain Removal Tricks and Shortcuts [Real Simple]
Stain Removal Chart [For Better Living]

Give Your Lampshades a Makeover With These Easy Projects

If you love doing DIY projects to spruce up your home, you’ll light up over these unexpected ways to dress up your basic lampshades. From polka dotted designs to artistic tie dyed effects, these tutorials have something for every type of home decor—and you can complete them in just a matter of hours!

Fabric Covered Lampshade Makeover [domesticsuperhero.com]
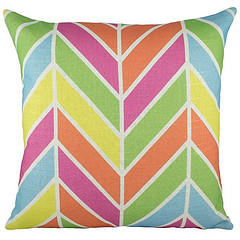
Although this tutorial uses a colorful chevron fabric to dress up an old lampshade, you can choose any type of fabric that fits into your design scheme. After you choose the perfect print, all it takes is a bit of hot glue to completely make over your lamp.

Gold Dot Lampshade [blog.landofnod.com]
There are few patterns more classic than simple polka dots, and this DIY will show you how to add them to a lampshade using only some metallic craft paint. By mapping off different sections with painter’s tape, you can ensure that your dots are evenly spaced.

Modern Marble Patterned Lampshade [minted.com]
This is one of the easiest and most eye-catching ways to dress up a lampshade, as it doesn’t require any painting, gluing, or even much measuring. Simply choose a wallpaper or wrapping paper in a pattern that you love, measure it to fit the shade, and attach it with a bit of regular office tape. This is especially helpful for parties, as you can remove the pattern once you want a less decorated look.

Grow Your Own Indoor Herb Garden With These 3 Tips

Nothing can add flavor to a dish quite like fresh herbs, but constantly buying them from the market can become costly. One budget-friendly alternative is to grow your own herbs at home. It's relatively easy to do, even for those of us not exactly blessed with green thumbs! Here are a few pointers for growing an indoor herb garden:

1) Start with the right herbs.
Mint, chives, thyme, rosemary, and oregano are the best herbs for beginners. Not only are they easy to care for, they're diversified enough to add something unique to a range of dishes. If your garden will be perched upon a windowsill, then opt for herbs in four-inch pots.

2) Find a sunny spot.
Herbs need at least six hours of bright sunlight per day, which is why many herb gardeners choose a windowsill to host their garden. If your herbs become "leggy," a term that describes herbs with long stems and few leaves, then your plant needs more light. Be sure to rotate your plants every so often to expose all parts of the herb to sunlight.

3) Don't over-water.
Establishing a watering schedule will require a little bit of trial and error. One fool-proof way to see if your herbs need water is to stick your finger about 1 1/2 inches into the soil. If the soil feels damp, then your plant isn't in need of a drink just yet.

Tips on Starting an Indoor Herb Garden [Style Me Pretty Living]
Grow Herbs Indoors This Winter [Better Homes and Gardens]
How to Grow Your Own Indoor Culinary Herb Garden [Simple Bites]
Tips for Growing Herbs Indoors [The Herb Gardener]

How to Organize Your Bedroom in 4 Simple Steps

The bedroom is supposed to be for sleeping, but for many of us, it’s also where we eat, where we work, and where we lounge around with the whole family. You bedroom takes a lot of wear and tear, but these four simple steps will help you to organize it with ease.

  1. Make your closet work for you. If your closet is overflowing with clothes and shoes, reassess what you need it to do. Add extra shelving if you have an abundance of sweaters, or invest in higher quality hangers if things are always falling on the floor. Having an organized closet takes a major weight off your shoulders.
  2. Keep furniture free of clutter. If your nightstands are covered in decorative knick knacks or personal items, minimize them. Keep only a few functional items on these surfaces, such as a bedside lamp or a jewelry box for storing rings and bracelets.
  3. Update your bed. Invest in a matching sheet and comforter set, or use a simple quilt for warmer weather. Having a full set that functions properly eliminates the need for lots of blankets and pillows that don’t match.
  4. Maximize storage potential. If you still need extra storage space, look in unexpected areas. Purchase a headboard with built-in shelves, or add rolling storage bins underneath your bed.

    Organizing 101 [Style at Home]
    Bedroom Organization Tips [House Beautiful]

Pin It on Pinterest