Speed Through Household Chores With These Cleaning Shortcuts

The faster you get your cleaning done, the more time you’ll have to spend time with friends and family. The trick to quick cleaning is to have a system and to stick to it. Set a time limit for each room and you’ll be finished before you know it. Follow these tips for quick and efficient cleaning!

  • Keep up with daily cleaning tasks to help maintain your home's tidiness. By doing simple tasks every day, the cleaning will be much easier and not be so overwhelming.
  • Use a tote or bucket to keep all your cleaning supplies in. You can bring this from room to room and you won’t need to waste time searching for the supplies you need.
  • Use a vacuum to clean all of your floor surfaces. You should also use an extension cord for the vacuum to allow you to reach multiple areas without taking the time to keep plugging it in.
  • On your shower walls and door, use a squeegee after every use. This will prevent soap scum and water spots later on.
  • Focus on what you are cleaning and cut out anything that might distract you, e.g., your phone and the TV!

13 Tips to Help You Speed-Clean Your Home [Better Homes and Gardens]
Clean Your House in Less Than an Hour [Woman’s Day]
Speed Cleaning: Tips For Fast & Efficient Housekeeping [The Inspired Room]

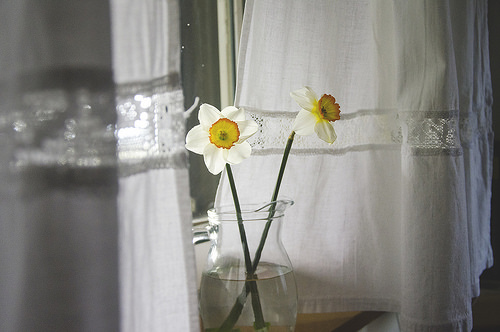
How to Add a Touch of Springtime to Your Home’s Decor

If you’re bursting with excitement about the warmer temperatures, longer days, and cheery sunshine that come along with the changing seasons, you can channel that springtime energy into your home by using just a few simple decorating tips. Here are some of the best ways to fill your living space with the bright, bountiful look of spring.

Lavender Linens [southernliving.com]
While you may have stocked your bathroom with plush, white towels to keep warm during the winter, the springtime calls for something lighter and more colorful. Invest in some lavender colored linens in the bathroom, and imagine yourself enjoying a warm weather getaway at a quaint B&B.

Milk Pail Garden Pots [marthastewart.com]
Use this gardening DIY to incorporate rustic milk pails into your springtime decor. Old-fashioned milk pails are commonly found at flea markets and agriculture supply stores, and they gain a chic look when filled with full, green ferns.

Bountiful Spring Bouquets [designsponge.com]
One of the best ways to add the feeling of spring to your home is by displaying fresh flowers, and this expert tutorial will show you how to arrange a florist-quality bouquet. Place them in a wooden crate for a country-inspired look that’s perfect for spring.

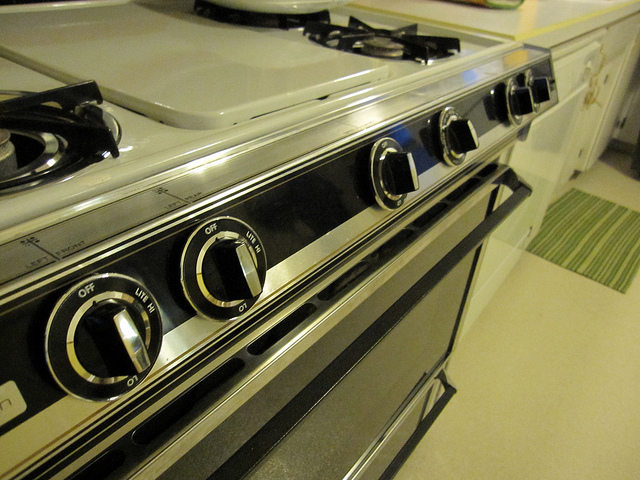
Chemical-Free Ways to Clean Your Oven at Hardrock Canyon

You’re always on the hunt for chemical-free ways to clean your home, but when it comes to really heavy duty cleaning in areas like the oven, it may seem almost impossible. Luckily, it is possible to clean your oven without using chemicals—it just takes a bit of ingenuity and a few smart tips from the pros.

  1. Take out the oven racks and let them soak in a tub of hot water.
  2. Make a paste of ¼ cup of baking soda, 2 tablespoons of coarse salt and just enough warm water to create a thick consistency.
  3. Using a durable sponge, scrub the paste into the stained parts in your oven. Concentrate on areas that see a lot of spills and drips, such as the bottoms and around the racks.
  4. Let the past sit on the stains for an hour or two, depending on their severity.
  5. Using the same sponge rinsed out with clean water, wipe away the paste and give it a second good scrub. You may also want to use a finer grade steel wool for difficult stains.
  6. For extra cleaning power, spray the entire oven with a spray bottle filled with white vinegar, then wipe it away with a clean cloth.
  7. Before replacing the oven racks, scrub them using simple steel wool and an all-natural dishwasher detergent to break down grease.

How To Clean an Oven Without Harsh Chemicals [Apartment Therapy]
Natural Oven Cleaning Recipe [Wellness Mama]
How To Clean an Oven With Baking Soda & Vinegar [The Kitchn]

How to Speed Through Household Cleaning Tasks

Whether you’re pressed for time before dinner guests arrive or simply overwhelmed with the amount of items on your to-do list, just about everyone could use some help when it comes to cleaning. Here are a few smart ways to help you speed through household cleaning tasks.

  • Work in a circle. Instead of attacking things in each room at random, make a plan to work in a circle. In the kitchen, that might mean wiping down the refrigerator and tossing out expired foods, giving the stove a good scrub, wiping down counter and tabletops, then loading the dishwasher last.
  • Start with the worst first. If you dread cleaning the bathroom or tidying up the bedroom, start with that room first. By getting the hardest part out of the way when you have the most energy, you’ll speed through the rest of your chores.
  • Take inventory while cleaning. If you notice that something doesn’t need to be cleaned, such as the already-spotless windows, then eliminate it from the list to save time. Unless it’s something requiring sanitization, like the toilet, there’s no shame in leaving it be.
  • Do a final sweep. Once you’re done with the major cleaning tasks, give your home a final sweep, putting everything in its right place and creating an organized look.

Speed Cleaning [The Inspired Room]
30 Quick and Easy Cleaning Tips [Woman’s Day]
9 Tips For Speed Cleaning [About Home]
Clean Your Home in Less than 20 Minutes [SheKnows]

How to Host a Successful Toy Swap With Your Friends, Family and Neighbors

If your children are too old for their current toys but you can’t bear to simply toss them out, you may be interested in hosting a toy swap with fellow parents. A toy swap enables you to swap your child’s old or unused toys with those of other children, bringing home a whole new haul of toys without spending a penny. Here are a few tips to help you pull off a successful toy swap.

  1. Create a list of guests. Try to pick guests who you feel comfortable with, who have children in varying ages, and who live fairly close to one another.
  2. Choose the perfect location. Because of the group of people and the large amount of toys, you’ll need to hold the swap in a large, fairly spacious room. If you don’t have this type of space in your own home, see if someone else would be willing to lend their living room.
  3. Send out invitations and guidelines. Emailing invitations seems to be the most convenient way to get the word out, so include a list of guidelines for the swap at that time. Describe what types of toys to bring, if they should be cleaned beforehand, how many toys to bring, and if there are any items that you won’t accept.
  4. Make it fun. Set out snacks, make sure everyone understands the rules, and keep things light-hearted!

How To Organize a Toy Swap or Toy Exchange [About Parenting]
How to Host a Toy Swap [30 Handmade Days]
How to Throw a Toy Exchange [Shareable]

Are You a Saver or a Spender? Find Out With These Fun Quizzes!

If you’re having a hard time getting a handle on your finances, you might like to get a bit more insight into exactly what type of person you are when it comes to your money. Do you prefer saving your money for a rainy day, or are you the type of person to splurge on an investment item? These fun online quizzes will help you find out!

Spender or Saver?
This straightforward quiz from 7th Mind asks questions about your payday behavior, your credit cards, and your debt in order to determine your spending (and saving) habits. It’s a psychology-based quiz, so expect to gain some insight into how your habits reflect on your personality.

What Kind of Spender Are You?
The Mint’s spending and saving quiz is a bit more in-depth, asking more specific questions and offering a wider variety of answers to really gauge your spending behavior. Because this site is all about financial planning, it also offers some resources that you might find useful once you get your results.

Are You a Spender or a Saver?
Get your finances under control with a bit of help from Money Matters to Me’s spending and saving quiz. If you’re interested in how your own spending habits affect your household and how you might be able to save a bit more here and there, this is the quiz for you!

How to Breathe New Life Into a Basic Bulletin Board

A bulletin board is a practical part of your kitchen or office, but it might not be the most attractive element in your decor. There are quite a few ways that you can take your drab bulletin board and turn it into something fabulous, and these simple tips will help!

  • Add a chevron border. Use simple acrylic paint to paint the entire frame, then create a bold chevron design across the bottom using the same bright color.
  • Cover it with fabric. If you’re more partial to prints and patterns, cut a piece of fabric into the same size as the bulletin board’s surface, then affix it to the board with basic spray adhesive or pushpins.
  • Turn it into a travel map. Purchase a frameless bulletin board and turn it into your own custom travel map. Use a craft knife to cut it into the shape of the United States, then attach push pins and photographs at all of the places you’ve visited.
  • Dress up your pushpins. If your basic plastic or metal pushpins are too plain for your taste, dress them up by gluing colorful pompoms to each end. Use all one color or choose a variety for a rainbow effect.
  • Use an embroidery hoop. Instead of using a traditional bulletin board from an office supply store, cover embroidery hoops in varying sizes with your favorite fabrics.

10 Ways to Update & Decorate a Basic Cork Board [Apartment Therapy]
13 Fun Ways to Decorate a Bulletin Board [Babble]
Craftykins // DIY Pom Pom Pushpins [Babiekins Mag]

Transform Your Textiles With These 6 Must-Know Tips for Painting Fabric

Do you have a dingy old couch that’s just begging for a makeover? It may seem impossible to redo your upholstered furniture without stripping it and reupholstering, but these tutorials for painting fabric will make you think differently about your dated sofa.

  1. Decide on a design. First, decide if you want to paint the entire surface of your furniture an entirely different color, or if you want to get really creative and add a funky pattern to the existing shade.
  2. Choose the right fabric. Tightly woven fabrics work better, as the paint has less chance of seeping through the weave.
  3. Wash. If you’re painting removable fabric, try to wash it first. Just make sure to skip the fabric softener to eliminate the amount of chemicals in the fabric.
  4. Choose the right paint. Purchase a fabric paint from your local craft store, and be sure to check the label to see how much you’ll need for the size of your fabric. Spray paints work best for all-over color, while tiny brushes and small paint buckets work well for patterns.
  5. Use multiple coats. Because most fabrics are already very bold, you’ll likely have to paint multiple coats to get the new color to completely cover the old one.
  6. Allow time to dry. Be sure to allow at least a full 12 hours in between each coat, and even longer before you sit on the couch or chair.

How To: Paint Fabric [Bob Vila]
Tutorial: How to Paint Upholstery Fabric and Completely Transform a Chair! [11 Magnolia Lane]
10 Fabric Painting Tips [About Home]

Stylish Storage Solutions for Kids’ Toys and Games

You love to see your kids happy and playing, but all of those toys and games can make quite a mess in your home. Here are a few smart ways to store and organize your kids’ toys, even if they’re not great about cleaning up after playtime.

  1. Under-couch storage. If your children usually play in the living room, invest in some under-couch storage drawers that you can simply tuck away once playtime is over. These drawers are flat enough to store under just about any sofa, and they make cleaning up a breeze.
  2. Bookcases. While you might only consider bookcases for storing, well, books, they also make a great way to store your kids’ games and toys. Simply add some large storage bins in coordinating colors to create a cohesive look.
  3. Bath toy storage. Keep all of those rubber duckies tucked neatly away after bathtime by installing a metal storage rod next to the bathtub. Hang metal buckets or plastic bins from the coordinating hooks to keep the toys out of the tub.
  4. Shoe organizers. Use cheap, plastic shoe organizers to keep smaller kids’ toys neatly organized. You can even hang them in the closet just like you would when storing shoes.

Hide the mess with style: 9 creative D-I-Y toy storage solutions [Today]
Genius Toy Storage Solutions You Can Make [HGTV]
50 Clever DIY Storage Ideas to Organize Kids’ Rooms [DIY & Crafts]

Want to Make Your Own Bedroom Headboard? Check Out These DIY Tutorials!

Purchasing a new headboard can get pretty expensive. Luckily, there are a number of creative ways to craft a headboard — or at least something that resembles one! Try out one of these awesome DIY tutorials for unique headboard alternatives.

Under $40 Wooden Headboard [echoesoflaughter.ca]
With a few pieces of scrap wood and some keen measuring skills, you can create this rustic, designer-inspired headboard in less than one afternoon. It’s also easy to customize to your specific bed size.

DIY Ruffled Fabric Headboard [bhg.com]
If you’re looking to add a sweet, feminine touch to a bedroom, this fabric-covered headboard is the perfect DIY project. If you’re not an expert seamstress, don’t worry: you don’t need to have any sewing skills, because this project only requires a simple hot glue gun, spray adhesive, and a drill.

Simple DIY Headboard [starsforstreetlights.com]
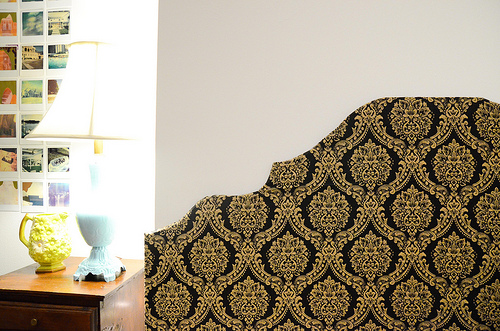
If you’re looking for something a bit more traditional, this classic design is the perfect choice. A cardboard base makes this project inexpensive, but cutting the board into an elegant shape and covering it with a luxurious fabric makes it look anything but.

Pin It on Pinterest