How to Host a Successful Toy Swap With Your Friends, Family and Neighbors

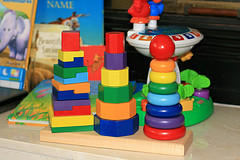
If your children are too old for their current toys but you can’t bear to simply toss them out, you may be interested in hosting a toy swap with fellow parents. A toy swap enables you to swap your child’s old or unused toys with those of other children, bringing home a whole new haul of toys without spending a penny. Here are a few tips to help you pull off a successful toy swap.

  1. Create a list of guests. Try to pick guests who you feel comfortable with, who have children in varying ages, and who live fairly close to one another.
  2. Choose the perfect location. Because of the group of people and the large amount of toys, you’ll need to hold the swap in a large, fairly spacious room. If you don’t have this type of space in your own home, see if someone else would be willing to lend their living room.
  3. Send out invitations and guidelines. Emailing invitations seems to be the most convenient way to get the word out, so include a list of guidelines for the swap at that time. Describe what types of toys to bring, if they should be cleaned beforehand, how many toys to bring, and if there are any items that you won’t accept.
  4. Make it fun. Set out snacks, make sure everyone understands the rules, and keep things light-hearted!

How To Organize a Toy Swap or Toy Exchange [About Parenting]
How to Host a Toy Swap [30 Handmade Days]
How to Throw a Toy Exchange [Shareable]
How to Breathe New Life Into a Basic Bulletin Board

A bulletin board is a practical part of your kitchen or office, but it might not be the most attractive element in your decor. There are quite a few ways that you can take your drab bulletin board and turn it into something fabulous, and these simple tips will help!

  • Add a chevron border. Use simple acrylic paint to paint the entire frame, then create a bold chevron design across the bottom using the same bright color.
  • Cover it with fabric. If you’re more partial to prints and patterns, cut a piece of fabric into the same size as the bulletin board’s surface, then affix it to the board with basic spray adhesive or pushpins.
  • Turn it into a travel map. Purchase a frameless bulletin board and turn it into your own custom travel map. Use a craft knife to cut it into the shape of the United States, then attach push pins and photographs at all of the places you’ve visited.
  • Dress up your pushpins. If your basic plastic or metal pushpins are too plain for your taste, dress them up by gluing colorful pompoms to each end. Use all one color or choose a variety for a rainbow effect.
  • Use an embroidery hoop. Instead of using a traditional bulletin board from an office supply store, cover embroidery hoops in varying sizes with your favorite fabrics.

10 Ways to Update & Decorate a Basic Cork Board [Apartment Therapy]
13 Fun Ways to Decorate a Bulletin Board [Babble]
Craftykins // DIY Pom Pom Pushpins [Babiekins Mag]

Want to Make Your Own Bedroom Headboard? Check Out These DIY Tutorials!

Purchasing a new headboard can get pretty expensive. Luckily, there are a number of creative ways to craft a headboard — or at least something that resembles one! Try out one of these awesome DIY tutorials for unique headboard alternatives.

Under $40 Wooden Headboard [echoesoflaughter.ca]
With a few pieces of scrap wood and some keen measuring skills, you can create this rustic, designer-inspired headboard in less than one afternoon. It’s also easy to customize to your specific bed size.

DIY Ruffled Fabric Headboard [bhg.com]
If you’re looking to add a sweet, feminine touch to a bedroom, this fabric-covered headboard is the perfect DIY project. If you’re not an expert seamstress, don’t worry: you don’t need to have any sewing skills, because this project only requires a simple hot glue gun, spray adhesive, and a drill.

Simple DIY Headboard [starsforstreetlights.com]
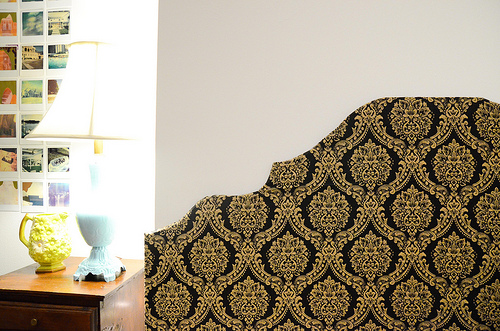
If you’re looking for something a bit more traditional, this classic design is the perfect choice. A cardboard base makes this project inexpensive, but cutting the board into an elegant shape and covering it with a luxurious fabric makes it look anything but.

Pin It on Pinterest