Pastry bags might bring to mind sophisticated chefs in tall white hats, but they’re actually very simple to use, and they make your baking look much more professional. Whether you want to create an elaborate decoration on a birthday cake or frost a batch of cupcakes, here are a a few simple tips to help you learn how to use a pastry bag.
- Choose the right tips. Pastry bags come with a wide variety of different tips, from large, wide-mouth options to tiny tips for intricate detailing. Choose a smaller tip if you want to write a message, or go wild with a larger tip for creating edging and decoration.
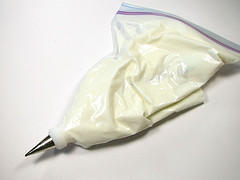
- Fill the bag. Using a spatula to direct the frosting, fill your bag. Be sure to fold half of the bag over your non-dominant hand to make it easier to close at the end. Once the bag is half filled, unfold the bag and give it a good twist at the top.
- Practice makes perfect. Lay out a sheet of wax paper and practice the designs on there first.
- Try a few designs. When you use a pastry bag, the design possibilities are endless. Create stars by holding the bag straight up and down while using a wide, star-shaped tip, or create polka dots the same way with a round tip. Hold the bag at an angle and rotate around the cake to make borders, pulling away quickly every few seconds to create a ribbon-like effect.
- Use the right touch. When you finally start to apply the frosting to the cake, don’t let the tip of the pastry bag touch the surface. It should hover just above, and you should apply constant, firm pressure. Be sure to twist the top of the bag as you go to ensure that the pressure inside stays consistent.
Do you have any pointers for pastry bag newbies? Share your tips below!
How to Use a Pastry Bag Without Making a Mess [Real Simple]
How to Use a Pastry Bag [Food52]
Frosting Cupcakes: How to Use a Pastry Bag [Craft Buds]


 Equal Housing Opportunity