Home Beauty Treatments You Can Make Yourself

Nothing feels better than getting a facial or a fresh blowout, but unfortunately, these types of beauty treatments can be pretty pricey. Luckily, you can mimic their results in your own home at Provence at Valencia, often by using common items that you already have. Here are a few rejuvenating beauty treatments that you can make yourself.

  1. Create a nourishing hair mask that restores each strand by combining common foods from the refrigerator. Simply mix together one egg yolk, one tablespoon of mayonnaise, 1/4 of an avocado, and two tablespoons of olive oil, and then let the mask sit on your hair for one hour before rinsing.
  2. Give yourself an at-home sugar scrub that sloughs off dead skin and leaves your body feeling smooth and rejuvenated. Combine equal parts coconut oil and brown sugar with a squeeze of fresh lemon juice, then rub it all over the next time you’re in the shower.
  3. Do a DIY facial using a mashed banana mixed with two tablespoons of heavy cream, one tablespoon of honey, one tablespoon of flour, and one tablespoon of water. Let the mask sit on your face for 10 minutes before rinsing. The banana reduces redness and adds smoothness, while the heavy cream is very soothing and leaves a soft, supple feeling behind.

10 All-Natural Beauty Fixes [Woman’s Day]
Crazy Beauty Tricks That Really Work [Whole Living]
Our Favorite All-Natural Home Beauty Treatments [Fitness Magazine]
10 DIY Beauty Treatments [Seventeen]
How to Keep Your Fridge at Provence at Valencia Clean and Fresh

Looking for easy ways to help keep your refrigerator clean and fresh? These smart and simple household items will help you to get out even the toughest food smells and leave your fridge smelling like new again!

  • Baking soda. This one isn’t just an old wives’ tale; baking soda really does help to absorb unpleasant scents and remove them from the air. Start by sprinkling some baking soda around your refrigerator and scrubbing with a damp sponge. Once you’re done, place an opened box inside to absorb any additional smells that might happen in the future.
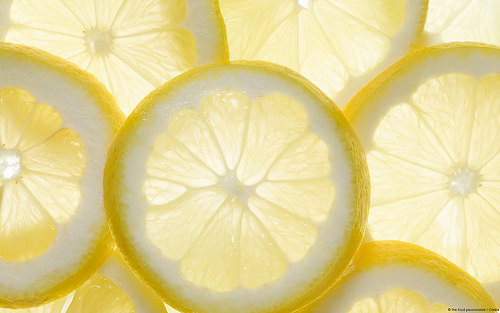
  • Lemons. Lemons are also all-natural deodorizers. Soak a cotton ball in a small bowl of lemon juice, and then leave it inside the refrigerator for several hours to permeate every inch of the interior.
  • Salt. Scrub the inside of your fridge with a simple salt and water solution, leaving the coarse granules for extra scrubbing power. This is a great way to do a heavy-duty clean without chemicals.
  • Liners. If you frequently find yourself scrubbing foul-smelling spills from condiments, leftovers, and other unsavory items, you might want to try lining the shelves of your fridge with paper towels. That way, you can simply remove them if (and when) a leak happens.

Clean and Deodorize Your Refrigerator [Reader’s Digest]
How To Clean & Organize a Refrigerator [Apartment Therapy]
Cleaning Your Fridge [Martha Stewart]

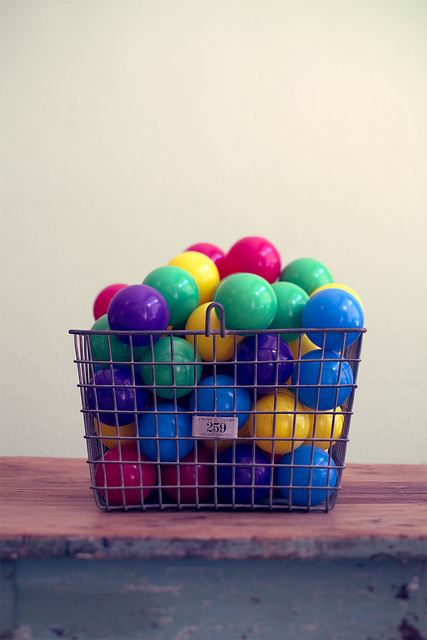
Stylish Storage Solutions for Kids’ Toys and Games

You love to see your kids happy and playing, but all of those toys and games can make quite a mess in your home. Here are a few smart ways to store and organize your kids’ toys, even if they’re not great about cleaning up after playtime.

  1. Under-couch storage. If your children usually play in the living room, invest in some under-couch storage drawers that you can simply tuck away once playtime is over. These drawers are flat enough to store under just about any sofa, and they make cleaning up a breeze.
  2. Bookcases. While you might only consider bookcases for storing, well, books, they also make a great way to store your kids’ games and toys. Simply add some large storage bins in coordinating colors to create a cohesive look.
  3. Bath toy storage. Keep all of those rubber duckies tucked neatly away after bathtime by installing a metal storage rod next to the bathtub. Hang metal buckets or plastic bins from the coordinating hooks to keep the toys out of the tub.
  4. Shoe organizers. Use cheap, plastic shoe organizers to keep smaller kids’ toys neatly organized. You can even hang them in the closet just like you would when storing shoes.

Hide the mess with style: 9 creative D-I-Y toy storage solutions [Today]
Genius Toy Storage Solutions You Can Make [HGTV]
50 Clever DIY Storage Ideas to Organize Kids’ Rooms [DIY & Crafts]

Organize Jewelry and Accessories With These Smart and Easy DIYs

If it seems almost impossible to keep your necklaces, rings, and other accessories neat and organized, read on! These smart tips will show you new, smart ways to keep your jewelry and accessories tidy and tangle-free. Best of all, you can make them yourself — inexpensively!

Antique Saucer Jewelry Storage [Buzzfeed]
Store your everyday jewelry right out in the open by using a few china tea saucers. You can usually find them at your local thrift store, and they make a good place to corral loose rings, bracelets, and earrings.

Hanging Thread Organizer [onegoodthingbyjillee.com]
Make a quick visit to your local craft store and purchase a wooden thread organizer. This handy storage solution is meant to hold spools of thread, but its numerous wooden pegs are also perfect for hanging necklaces and bracelets on the back of a door, on the wall, or inside of a cabinet.

Corkboard Jewelry Holder [beehiveandbirdsnest.com]
Many people have an unused corkboard tucked away in a closet, and if you don’t, you can easily pick one up for cheap at an office supply store. Place attractive push-pins all over the corkboard and arrange them in a way that best suits your jewelry collection.

How to Use Rubbing Alcohol Around the Home

You likely rely on rubbing alcohol to treat cuts and scrapes, but did you know that this medicine cabinet staple has uses beyond the bathroom? Here are three lesser-known uses for rubbing alcohol:

1) Tackle tough ink stains
Pre-treat ink stains by dabbing the area with rubbing alcohol. It's also said that rubbing alcohol can prevent ring around the collar: Simply swipe your neck with a cotton ball dampened with rubbing alcohol before dressing. Note, though, that this can be drying to the skin, so apply sparingly.

2) Clean your gadgets
You probably already use alcohol to disinfect your toothbrushes and thermometers, but you can also use rubbing alcohol to clean your electronics. Dampen a lint-free cloth with a small amount of rubbing alcohol, and use it to wipe down your cell phones, keyboard, computer mouse, and tablets.

3) De-grease the kitchen
Rubbing alcohol makes easy work of removing grease from around the kitchen. Pour a small amount of rubbing alcohol onto a paper towel, and wipe down countertops and stovetops. The rubbing alcohol helps dissolve the grease and grime left behind by cooking.

12 Ways to Use Rubbing Alcohol [Reader's Digest]
25 Alternative Uses for Rubbing Alcohol [Daily Finance]
35 Uses for Rubbing Alcohol [Fluster Buster]
Rubbing Alcohol Uses: Ideas For Using The All-Purpose Household Cleaner [HuffPost Green]

4 Uncommon Household Uses for Petroleum Jelly

If you’re looking to save a bit of money around the house, there are a few products more versatile than petroleum jelly. You likely already have a tub of the thick, gooey jelly in your medicine cabinet, but it has a number of different uses that you might not know about. Here are some creative ways to use petroleum jelly around the house.

  1. Erase watermarks from wood. If your old coffee table is dotted with circular watermarks from cups and glasses, remove them in one easy step with petroleum jelly. Just smear some on and let it sit overnight, then wipe the jelly away with a clean cloth.
  2. Moisturize leather goods. If your everyday shoes or that favorite jacket are looking a bit worse for the wear, give them a makeover with petroleum jelly. Just rub it in and wipe off the excess to keep leather goods looking as good as new.
  3. Reduce corrosion on a car battery. Lengthen the life of your car battery by disconnecting the terminals and cleaning them off with a wire brush. Put everything back together and coat it with petroleum jelly to prevent corrosion, especially during cold winter month.
  4. Fix a squeaking door. Grease the hinges of a squeaky door with petroleum jelly to keep it smooth and silent.

16 Practical Uses for Petroleum Jelly [All You]
26 Extraordinary Uses for Petroleum Jelly [Reader's Digest]
57 Uses for Petroleum {Free} Jelly [One Good Thing]

How to Tackle Stubborn Coffee, Wine and Ink Stains

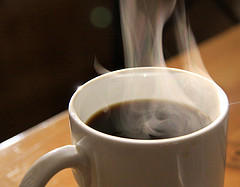
Your morning cup of coffee is a beautiful sight for weary eyes—but not when it's spilled down the front of your go-to work shirt. Keep these stain-fighting tips handy so you can meet common household stains with a plan of attack.

To remove coffee and tea stains:
Coffee and tea are categorized as "tannin" stains. These types of stains should be treated with detergent as opposed to soap. If the fabric is washable, you'll want to pre-treat the stain with a stain remover, then toss the garment into the wash with an enzyme detergent on the hottest water temperature permissible for the fabric. If you prefer, you can pre-treat the stain with a solution of one part white vinegar and two parts water, then wash.

To remove wine stains:
Also a tannin stain, wine stains are easier to remove when fresh. First, blot the stain using a lint-free towel to remove as much of the wine as possible. Before the stain can dry and "set" into the fabric, soak the garment in a solution of water and oxygen-based laundry booster. Afterwards, wash the garment in a regular laundry cycle of hot water.

To remove ink stains:
Place a towel underneath the stain, then blot the ink with another lint-free towel that's dampened with rubbing alcohol. The rubbing alcohol will transfer the ink to the towel that's underneath the shirt, so don't use your favorite bath towel for this method!

17 Easy Stain Removal Tips [Lifescript]
Stain Removal Tricks and Shortcuts [Real Simple]
Quick 'n Easy Stain Removal [Ohio State University]
6 Easy Recipes for Removing Nasty Stains [Wonder HowTo]

Heading Outside During a Heat Wave? Here’s How to Stay Safe!

You’ve had plans to go to a baseball game for weeks, but now the news report says that temperatures are expected to rise to 90 degrees or above. What should you do? If you’re faced with a day outdoors during a heat wave, it’s important to keep yourself and those around you safe before heading out of the air conditioning. These simple tips will prevent heat stroke and other harmful heat related illnesses.

  1. Be aware of weather forecasts. Don’t get stuck in a heat wave unprepared. Be sure to watch the local news, read the newspaper, or even check online to stay informed about potential heat waves in your area.
  2. Don’t leave children or pets in vehicles. Even if your kids are a bit older and you often leave them in the car at the drugstore or supermarket, take special precautions during a heat wave. Never leave a child or pet alone in the car, even if the windows are cracked!
  3. Drink water. If you decide to brave the elements and head outdoors, make sure that you always carry fresh water wherever you go. When temperatures rise above 90 degrees, it’s important to drink at least one gallon of water throughout the day.

Heat: A Major Killer [National Weather Service]
Summer Heat Safety Tips [Love to Know]
NYC Hazards: Extreme Heat and Your Health [NYC.gov]
Red Cross Offers Ways to Stay Safe During a Heat Wave [Red Cross]

Frosting 101: 5 Pointers for Pastry Bag Novices

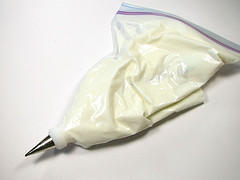
Pastry bags might bring to mind sophisticated chefs in tall white hats, but they’re actually very simple to use, and they make your baking look much more professional. Whether you want to create an elaborate decoration on a birthday cake or frost a batch of cupcakes, here are a a few simple tips to help you learn how to use a pastry bag.

  1. Choose the right tips. Pastry bags come with a wide variety of different tips, from large, wide-mouth options to tiny tips for intricate detailing. Choose a smaller tip if you want to write a message, or go wild with a larger tip for creating edging and decoration.
  2. Fill the bag. Using a spatula to direct the frosting, fill your bag. Be sure to fold half of the bag over your non-dominant hand to make it easier to close at the end. Once the bag is half filled, unfold the bag and give it a good twist at the top.
  3. Practice makes perfect. Lay out a sheet of wax paper and practice the designs on there first.
  4. Try a few designs. When you use a pastry bag, the design possibilities are endless. Create stars by holding the bag straight up and down while using a wide, star-shaped tip, or create polka dots the same way with a round tip. Hold the bag at an angle and rotate around the cake to make borders, pulling away quickly every few seconds to create a ribbon-like effect.
  5. Use the right touch. When you finally start to apply the frosting to the cake, don’t let the tip of the pastry bag touch the surface. It should hover just above, and you should apply constant, firm pressure. Be sure to twist the top of the bag as you go to ensure that the pressure inside stays consistent.

Do you have any pointers for pastry bag newbies? Share your tips below!

How to Use a Pastry Bag Without Making a Mess [Real Simple]
How to Use a Pastry Bag [Food52]
Frosting Cupcakes: How to Use a Pastry Bag [Craft Buds]

Three Space Saving Ideas for Apartment Renters

With all the stuff we have in our lives, our apartments can get pretty crowded. Each item might seem like a necessity, making it hard to part with anything. One solution? Maximize your space by finding space-saving storage solutions. Here are three ideas:

Hang pots, pans, and utensils
In many homes, the kitchen becomes a magnet attracting stuff, causing cabinets and drawers to fill up fast. One solution is to use hooks to hang stuff like mugs, utensils, and pots and pans. That way it'll be out of the way when you need to use the counter space, but ready at hand when you're set to cook.

Use your dresser drawers effectively
Dresser drawers offer storage to complement your closets. And one simple trick can help you use them more effectively: store your clothes filed front-to-back (like you'd do while shelving books) instead of simply stacking them.

Find multi-use furniture
An ottoman can double as storage for blankets and pillows. The space beneath your bed can hide plastic storage containers, and some bed frames even include drawers. Multi-use furniture can keep your stuff stored… and out of sight.

17 Space-Saving Solutions for Small Kitchens [Houzz]
Top 10 Space-Saving Household Projects [Lifehacker]
10 Ways to Maximize Space in a Small Bedroom [Freshome]