How to Make Your Very Own Succulent Wall Planter

If you love the look of succulent plants and want to incorporate them into your decor at Reserve at Garden Oaks, there are a number of stylish and creative ways to do so. Instead of planting a succulent in the usual pot, try something a bit more unique by using this fun tutorial for a DIY wall planter.

  1. Start with a shallow wooden box. Think an old drawer, an antique crate, or even a picture frame with wood behind it for reinforcement.
  2. Cover the surface of the box with chicken wire or galvanized mesh. Use a staple gun to attach it to each side, and be sure to snip off the sharp edges.
  3. Add a strip of wire used for hanging photo frames to the back. Be sure to choose something that can handle heavy weight.
  4. Add soil specifically formulated for succulents. Fill it completely to the top of the chicken wire.
  5. Plant your succulents. Position them in between the squares in the wire.
  6. Water once, and then let the whole thing sit flat in the sun for four to six weeks. This will enable the succulents have time to root before hanging.
  7. Hang on a wall that can handle the weight of the plants. Choose a place with a stud behind it, or add a shelf underneath for added support.

Make a Living Succulent Picture [Better Homes & Gardens]
Make your own living succulent art [Sunset]
Let’s Craft: How to Make a Succulent Wall [Modern Mom]
Update Basic Magnets and Pushpins WIth These Fun Tutorials

Who says office supplies have to be boring? Here are a few crafty ways to transform your basic pushpins and magnets into something eye-catching, playful, and perhaps a bit chic.

Bottle Cap Magnets and Thumbtacks [marthastewart.com]
Start saving up those used bottle caps, because you’re certainly going to want to try this adorable DIY project from Martha Stewart. Simply glue a small photo inside of each bottlecap, then use contact cement to attach them to the magnets and pushpins and create a tiny photo gallery.

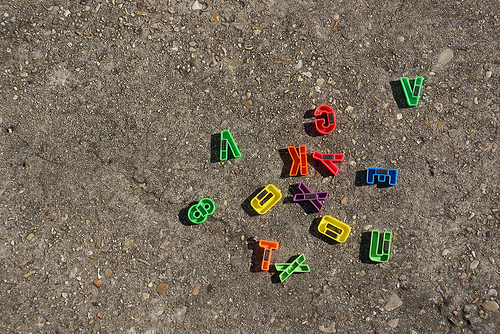
DIY Gold Magnetic Letters [inspiredbycharm.com]
If you loved making silly words and phrases from those colorful magnetic letters as a kid, you’ll enjoy this chic, updated version just as much. Just cover those childish magnets with luxe gold spray paint for a modern, updated look.

Washi Tape Clothespins [designertrapped.com]
By covering affordable wooden clothespins with different types of colorful washi tape, you can create this fun project in less than an hour. Add adhesive magnets to the backs of each clothespin to use them on the refrigerator, or line them up on a wire to hang photos from a wall.

Put a Spring in Your Step With These Springtime Decorating Tips

After spending an entire weekend checking off items on your spring cleaning checklist, you’re likely ready to add a few fun, spring-themed touches to your freshly cleaned home. It doesn’t take a big budget to decorate your home for the changing season, however; all it takes is some creativity and these adorable decorating tips.

  • Use natural items wherever possible. Go outside and gather blooming branches, pebbles, and other organic objects to use in your DIY decor. Arrange them in a clear bowl on the center of the table, or corral them in a wicker basket for a chic, natural look.
  • Switch out your throw pillows. Add a burst of citrus-inspired color to your living area just in time for spring by replacing your usual throw pillows with bright, cheerful alternatives.
  • Add a bit of green. Nothing says springtime like live plants in the home, so make a stop at your local nursery to pick up a few for your home. Ferns are an especially good idea because they make a big impact and are easy to care for.
  • Change your doormat. If your current doormat looks a bit worse for the wear from all of those heavy winter boots, switch it out for something fun and colorful or even a mat with a cheeky greeting.

Easy Spring Decorating Ideas [Midwest Living]
Inspired Spring Décor [Better Homes & Gardens]
10 Decorating Ideas for Spring [Style at Home]

Give Your Lampshades a Makeover With These Easy Projects

If you love doing DIY projects to spruce up your home, you’ll light up over these unexpected ways to dress up your basic lampshades. From polka dotted designs to artistic tie dyed effects, these tutorials have something for every type of home decor—and you can complete them in just a matter of hours!

Fabric Covered Lampshade Makeover [domesticsuperhero.com]
Although this tutorial uses a colorful chevron fabric to dress up an old lampshade, you can choose any type of fabric that fits into your design scheme. After you choose the perfect print, all it takes is a bit of hot glue to completely make over your lamp.

Gold Dot Lampshade [blog.landofnod.com]
There are few patterns more classic than simple polka dots, and this DIY will show you how to add them to a lampshade using only some metallic craft paint. By mapping off different sections with painter’s tape, you can ensure that your dots are evenly spaced.

Modern Marble Patterned Lampshade [minted.com]
This is one of the easiest and most eye-catching ways to dress up a lampshade, as it doesn’t require any painting, gluing, or even much measuring. Simply choose a wallpaper or wrapping paper in a pattern that you love, measure it to fit the shade, and attach it with a bit of regular office tape. This is especially helpful for parties, as you can remove the pattern once you want a less decorated look.

Make Your Own Jewelry With These Easy Tutorials

Making jewelry is a stylish, creative craft beloved by people of all ages. Crafters love that they can customize each piece to their exact preferences, and it also saves you money if you’re a bit of a jewelry addict. Here are three helpful tutorials that will show you how to start making your own jewelry right in your own home.

Suede and Chain Woven Bracelet [yesmissy.com]
This DIY jewelry project is worlds away from the braided friendship bracelets from your youth. With a bit of glitz from the metal chain and a touch of neutral color from the suede rope, these bracelets rival the ones that you would buy at a pricey jewelry boutique.

Bobby Pin Earrings [themetricchild.blogspot.com]
You may not have ever considered using bobby pins as jewelry, but once you see this adorably edgy jewelry DIY you’ll wish that you had thought of it sooner. Painting the pins with nail polish also enables you to add a bit of color to coordinate with the rest of your wardrobe.

Polymer Clay Bead Necklace [delightedmomma.com]
Polymer clay necklaces have been floating around the blogs for quite some time now, but this completely customizable version is one of the best. You can mold the clay beads into exactly the sizes that you want, and you can also choose paint colors to create your favorite palette.

Keeping Busy After Retirement: 5 Engaging Hobbies

Many new retirees find themselves wondering how to fill their days. Here are some simple and rewarding hobbies for retirees:

Handcrafts
Hobbies like wood carving, weaving, and knitting harken back to simpler times when families had to make much of what they used by hand. These hobbies produce useful results, exercise our brains in important ways, and keep fingers limber.

Writing
Taking a writing class or joining a writing group is an opportunity to develop your skills and creativity as well as make social connections. Write memoirs, poetry, even letters, and be sure to keep a copy of what you’ve written.

Teach a Class
Experience the satisfaction of sharing your skills and passion with other people. Talk to activity coordinators at local libraries, senior centers, and community colleges about what you can offer them.

Sports
Many fitness and senior centers offer special programs for adults 50 and over. From swimming to table tennis, you’ll find that opportunities abound for fitness and fun.

Music
Playing music is fun and keeps your mind and body active. Consider taking up that instrument you've always wanted to play!

Pin It on Pinterest