How to Choose the Lighting That Best Complements Your Space

Want to show your apartment in the most flattering light possible? Use these smart tips for choosing the right type of lighting for every room in your home.

  • Illuminate your foyer and hallway with bright, cheery lighting. Add a floor lamp directly next to the front door that will light your way when you come home at night, and consider placing a bright lamp on a side table in the hallway so that you can easily see where you’re going.
  • Add soft, soothing light in the bedroom, as this is supposed to be a place of relaxation. Try using a small lamp with a lower-watt light bulb.
  • In the living room, you can add a tall, arched lamp next to the couch for a stylish look and to add additional lighting when you’re lounging around at night. If the light bulbs in the overhead light are too bright, switch them out with something less glaring.
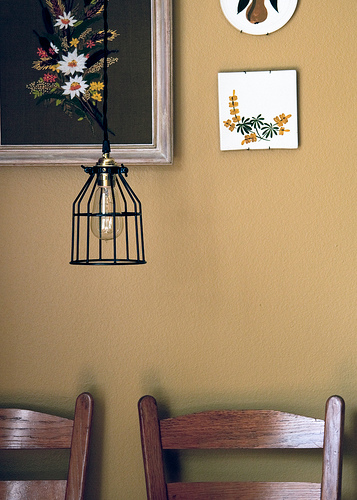
  • Add a hanging pendant light right above the kitchen table. There are many options that don’t require hardwiring, so you can easily hang them and switch them out when you move.

How to Choose the Right Lighting for Each Room [WikiHow]
How To Choose The Lighting Fixtures For Your Home – A Room-By-Room Guide [HomeDit]
How to Choose the Right Size Lighting Fixture [LightsOnline.com]
Update Basic Magnets and Pushpins WIth These Fun Tutorials

Who says office supplies have to be boring? Here are a few crafty ways to transform your basic pushpins and magnets into something eye-catching, playful, and perhaps a bit chic.

Bottle Cap Magnets and Thumbtacks [marthastewart.com]
Start saving up those used bottle caps, because you’re certainly going to want to try this adorable DIY project from Martha Stewart. Simply glue a small photo inside of each bottlecap, then use contact cement to attach them to the magnets and pushpins and create a tiny photo gallery.

DIY Gold Magnetic Letters [inspiredbycharm.com]
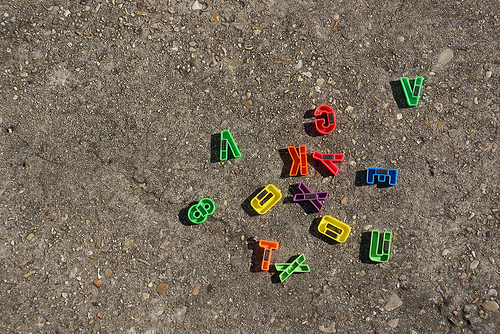
If you loved making silly words and phrases from those colorful magnetic letters as a kid, you’ll enjoy this chic, updated version just as much. Just cover those childish magnets with luxe gold spray paint for a modern, updated look.

Washi Tape Clothespins [designertrapped.com]
By covering affordable wooden clothespins with different types of colorful washi tape, you can create this fun project in less than an hour. Add adhesive magnets to the backs of each clothespin to use them on the refrigerator, or line them up on a wire to hang photos from a wall.

Interior Design 101: Decorating Tips for Beginners

So you didn’t go to school for interior design? No big deal; you can still transform your home into a designer-worthy space using just a few simple tips. These handy tricks will show you how to inject a stylish, inspiring look into any room in your home.

  1. Use symmetry. If you’re unsure of how to arrange the furniture in a room or hang frames on a wall, simply keep the idea of symmetry in mind. Symmetrical rooms are more pleasing to the eye, so try adding two sofas facing one another to help balance your living room.
  2. Consider the scale. Be sure to choose furniture in a size that fits your specific room. Choose large, overstuffed items for more open rooms and compact, apartment-sized furniture in smaller spaces.
  3. Choose a focal point. If the majority of your furniture is fairly plain, invest in one statement piece as an accent. Try a colorful chair, a large, framed painting, or an ornate rug.
  4. Use color to your advantage. Choose the color scheme of a room based on what type of emotion you want the room to convey. For example, use soft, soothing tones to encourage relaxation in a bedroom.
  5. Mix new and vintage pieces. While a room full of thrift store furnishings may look mismatched, using all brand new furniture looks impersonal. Combine the two styles for a designer look.

Top Interior Design Tips for Beginners [Bliss at Home]
Interior Design 101 [Visual.ly]
What are Some Interior Design Tips for Beginners? [Wise Geek]

How to Host a Successful Toy Swap With Your Friends, Family and Neighbors

If your children are too old for their current toys but you can’t bear to simply toss them out, you may be interested in hosting a toy swap with fellow parents. A toy swap enables you to swap your child’s old or unused toys with those of other children, bringing home a whole new haul of toys without spending a penny. Here are a few tips to help you pull off a successful toy swap.

  1. Create a list of guests. Try to pick guests who you feel comfortable with, who have children in varying ages, and who live fairly close to one another.
  2. Choose the perfect location. Because of the group of people and the large amount of toys, you’ll need to hold the swap in a large, fairly spacious room. If you don’t have this type of space in your own home, see if someone else would be willing to lend their living room.
  3. Send out invitations and guidelines. Emailing invitations seems to be the most convenient way to get the word out, so include a list of guidelines for the swap at that time. Describe what types of toys to bring, if they should be cleaned beforehand, how many toys to bring, and if there are any items that you won’t accept.
  4. Make it fun. Set out snacks, make sure everyone understands the rules, and keep things light-hearted!

How To Organize a Toy Swap or Toy Exchange [About Parenting]
How to Host a Toy Swap [30 Handmade Days]
How to Throw a Toy Exchange [Shareable]

How to Create a Home “Command Center”

There are likely days when it maintaining your—or your family's—day-to-day schedule can prove to be a daunting task. Why not consider creating a central home command center? You can rely on this single location to keeping things running smoothly in your abode. Here's how to do it:

  1. Choose the perfect space. Whether you pick an unused wall in the kitchen or a small nook in the living room, just about any centrally located space in your home will do.
  2. Post a bulletin board. This is essential for displaying notes, recording missed phone calls, or posting bills with near-approaching due dates.
  3. Add a calendar. Keep everyone’s sports schedules and work trips on file with a large calendar in your command center. Encourage your family members to write their upcoming appointments on the calendar so that there’s no missed communication as the date approaches.
  4. Take advantage of shelves. Whether you have a full bookcase or a simple hanging shelf, shelves are important for storing file folders, medical records, and bins for spare keys and other essentials.
  5. Cut the clutter. To avoid clutter in your command center, weed out the junk mail, magazines, smelly gym bags, and other unimportant items.

Do you have tips for staying organized? Please share them!

How to Organize the Family Command Center [Real Simple]
Family Command Center [Pinterest]
Done in a Day: Family Command Center [Southern Living]

How to Keep Your Furniture Looking Like New

Purchasing furniture is one of the priciest investments that you make in your home, so you likely want to keep it looking as good as new. Follow these smart tips for preventing stains, rips, and other signs of wear and tear on your new furniture.

  1. Invest in high-quality pieces. First and foremost, investing in good quality furniture is one of the very best ways to ensure that it keeps its original look for years to come.
  2. Protect your fabrics and upholstery. When you first purchase a new rug or upholstered sofa, pay a bit extra to have a professional administer a protective coating to repel stains.
  3. Flip sofa cushions. By flipping your sofa cushions monthly, you can distribute the weight from frequent use to multiple parts of the cushion.
  4. Minimize eating in the living room. If you’re already trying to break this bad habit, just imagine a food stain on your brand new sofa for a bit of extra motivation.
  5. Tackle stains immediately. Whether it’s on a rug or the sofa, the most important way to prevent permanent staining is by addressing it immediately so that it can’t sink into the fabric. Read the care instructions on your furniture or rugs when you purchase them so that you know exactly how to remove that red wine stain before it inflicts major damage.

How to Keep Your Furniture Looking Like New [WikiHow]
4 Steps to Keep Your Furniture Looking New [Apartment Therapy]
Keep Your Sofa Looking Like New in 3 Easy Steps! [Shofer’s]

Give Your Lampshades a Makeover With These Easy Projects

If you love doing DIY projects to spruce up your home, you’ll light up over these unexpected ways to dress up your basic lampshades. From polka dotted designs to artistic tie dyed effects, these tutorials have something for every type of home decor—and you can complete them in just a matter of hours!

Fabric Covered Lampshade Makeover [domesticsuperhero.com]
Although this tutorial uses a colorful chevron fabric to dress up an old lampshade, you can choose any type of fabric that fits into your design scheme. After you choose the perfect print, all it takes is a bit of hot glue to completely make over your lamp.

Gold Dot Lampshade [blog.landofnod.com]
There are few patterns more classic than simple polka dots, and this DIY will show you how to add them to a lampshade using only some metallic craft paint. By mapping off different sections with painter’s tape, you can ensure that your dots are evenly spaced.

Modern Marble Patterned Lampshade [minted.com]
This is one of the easiest and most eye-catching ways to dress up a lampshade, as it doesn’t require any painting, gluing, or even much measuring. Simply choose a wallpaper or wrapping paper in a pattern that you love, measure it to fit the shade, and attach it with a bit of regular office tape. This is especially helpful for parties, as you can remove the pattern once you want a less decorated look.

How to Keep Raw Meat Fresh Longer in the Fridge

Meat is an important part of most people’s diets, and it can take up quite a large chunk of your grocery budget. Unfortunately, meat is also difficult to store and has a shorter shelf life than other groceries. Here are a few tips that will help you to store meat properly and make it last longer!

  1. Keep your refrigerator at the proper temperature. In order to store meat in your refrigerator, it should be kept at or below 40 degrees. If you plan on freezing meat, the freezer should be kept at or below 0 degrees.
  2. Timing is everything. In order to safely store cooked meat, you must refrigerate it within two hours of eating. If you’re storing it raw, be sure to refrigerate or freeze it immediately.
  3. Store it in the proper containers. Be sure to refrigerate or freeze meat in a shallow container that is barely bigger than the meat itself. This will ensure that it becomes cold as quickly as possible and isn’t exposed to any air.
  4. Be cautious about freezing. Freezing meat is a great way to make your meat last longer, but you need to be cautious about freezer burn. Be sure to wrap meat thoroughly in plastic wrap, aluminum foil, or wax paper before storing the meat in the freezer.

Storage Times for the Refrigerator and Freezer [Foodsafety.gov]
Meat in the Refrigerator: How Long Does It Last? [Foodsafety.gov]
How to Store Food Properly in the Freezer and Fridge [Lifehacker]
Food Storage 101: Where and How Long to Keep Your Favorite Foods [Lifehacker]

Make Your Own Jewelry With These Easy Tutorials

Making jewelry is a stylish, creative craft beloved by people of all ages. Crafters love that they can customize each piece to their exact preferences, and it also saves you money if you’re a bit of a jewelry addict. Here are three helpful tutorials that will show you how to start making your own jewelry right in your own home.

Suede and Chain Woven Bracelet [yesmissy.com]
This DIY jewelry project is worlds away from the braided friendship bracelets from your youth. With a bit of glitz from the metal chain and a touch of neutral color from the suede rope, these bracelets rival the ones that you would buy at a pricey jewelry boutique.

Bobby Pin Earrings [themetricchild.blogspot.com]
You may not have ever considered using bobby pins as jewelry, but once you see this adorably edgy jewelry DIY you’ll wish that you had thought of it sooner. Painting the pins with nail polish also enables you to add a bit of color to coordinate with the rest of your wardrobe.

Polymer Clay Bead Necklace [delightedmomma.com]
Polymer clay necklaces have been floating around the blogs for quite some time now, but this completely customizable version is one of the best. You can mold the clay beads into exactly the sizes that you want, and you can also choose paint colors to create your favorite palette.

Pin It on Pinterest