Organize Jewelry and Accessories With These Smart and Easy DIYs

If it seems almost impossible to keep your necklaces, rings, and other accessories neat and organized, read on! These smart tips will show you new, smart ways to keep your jewelry and accessories tidy and tangle-free. Best of all, you can make them yourself — inexpensively!

Antique Saucer Jewelry Storage [Buzzfeed]
Store your everyday jewelry right out in the open by using a few china tea saucers. You can usually find them at your local thrift store, and they make a good place to corral loose rings, bracelets, and earrings.

Hanging Thread Organizer [onegoodthingbyjillee.com]
Make a quick visit to your local craft store and purchase a wooden thread organizer. This handy storage solution is meant to hold spools of thread, but its numerous wooden pegs are also perfect for hanging necklaces and bracelets on the back of a door, on the wall, or inside of a cabinet.

Corkboard Jewelry Holder [beehiveandbirdsnest.com]
Many people have an unused corkboard tucked away in a closet, and if you don’t, you can easily pick one up for cheap at an office supply store. Place attractive push-pins all over the corkboard and arrange them in a way that best suits your jewelry collection.
Resume Writing Tips for Job Seekers

Making a good first impression plays a huge role in landing your dream job, and, for most people, that first impression begins with a resume. Here are a few simple tips to help you write a resume that’s equal parts smart, savvy, and interesting.

  1. Make it easy to read. While you want your resume to look aesthetically pleasing (even more so if you’re in a creative profession), it should first and foremost be easy to read. Choose a simple font, place the most important points at the top, and limit your resume to just one page.
  2. Include up-to-date contact information. This one may seem like a no-brainer, but it’s one of the most important parts of the whole resume. Be sure to include your cell phone number, home phone number, email address, and physical address.
  3. Add an objective. Before listing your experience, state an objective that clearly defines your career goals.
  4. Include popular keywords. Consider the increasingly digital state of the job market and treat your resume like any other online content. Include keywords related to your chosen field so that you’ll increase the chance of employers finding it online.
  5. Take it to the streets. Once your resume is complete, don’t be shy about handing out physical copies anywhere and everywhere you go—you never know where your big break will come from.

Top 10 Resume Writing Tips [About Careers]
6 Tips for Writing an Effective Resume [ASME]
Resume Writing Tips [Yale University]

Travel Etiquette Tips Every Jetsetter Should Know

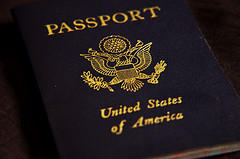
When you’re planning a big trip, you likely think about what to pack, what travel arrangements to make, and which sights to see once you arrive at your destination. But do you ever think about travel etiquette? Proper etiquette on airplanes or buses is something that most people don’t think about until they’re faced with an awkward situation. Avoid uncomfortable run-ins with fellow passengers with these smart tips:

  1. Start in the gate area. At the airport, try to take up as little space as possible in the gate area. Don’t leave bags or other luggage on empty seats, as these places often get very crowded.
  2. Stick with your zone. Although it might be tempting to board your plane early, boarding zones are created for a reason: to keep things running smoothly and efficiently.
  3. Recline kindly. Before you jolt your seat backward and hit another passenger’s knees or jostle his or her computer, simply turn around and ask if it’s okay.
  4. Don’t rush off the plane or bus. Even if you’re in a hurry, it’s important to let the seats ahead of you exit the plane first.
  5. Navigate the airport or subway station like a highway. This means always stay to the right while walking. If you’re on a moving walkway, walkers should stay to the left, standers on the right.

Travel Etiquette Dos and Don'ts [Travel + Leisure]
10 Travel Etiquette Tips [TripIt]
Whose Feet Are Those? Negotiating Air-Travel Etiquette [The New York Times]

6 Tips for Creating a Fabulous At-Home Bar Cart

Entertaining guests in your home is sometimes more fun than going out. Every gathering needs a well-stocked bar with delicious drinks for folks to enjoy. If your house is where the party is, check out these six great tips for putting together a swanky bar cart that will be the center of attention.

1. Get a great cart.
Depending on your personal style, select a cart that fits your aesthetic, whether it be modern, industrial, or vintage. Make sure the cart has a few different shelves or drawers for holding various accouterments.

2. Select a stylin’ tray.
Find a tray that can be set on top of the cart, so you can prepare a few drinks to walk around and distribute throughout the party. Mirrored trays look swanky, while colorful plastic trays give off fun vibes.

3. Sport a cool decanter.
Bottles of booze are fine, but pouring your liquor into a cool decanter ups your level of commitment to style. Bonus: Label snobs won’t judge your selection; that bargain booze will appear fit for a king being poured from a crystal bottle!

4. It's in the mix.
Make sure you have the basics covered: gin, vodka, and whiskey. If your party craves one liquor over another, make sure it has a place on your cart, along with the appropriate mixers and garnishes.

5. Stock your toolkit.
You have got to have the right drink mixing tools on hand, like shot glasses, stirrers, shakers, and drinkware.

6. Cool it off.
This is important to keep the drinks tasting fresh. Get a bucket or put the ice in a festive bowl with a pair of tongs.

Assembling the Perfect Bar Cart [The Intentional Apartment]
Create and Stylize the Perfect Bar Cart [Guest of a Guest]
How to Style a Bar Cart [DIY Playbook]
How to Style a Bar Cart [Style Within Reach]
How to Style a Bar Cart [HGTV]

How to Better Organize Your Under-Sink Storage

Whether it’s in the kitchen or the bathroom, the under-sink area is like a no-man’s land of cleaning supplies, sponges, beauty products and, for many people, even a garbage can. Just because these spaces are hidden doesn’t mean that they should be disorganized, however. The under-sink area is an untapped resource for storage space, and these helpful tips will show you how to get everything in order.

  1. Empty it out. Before you attempt to organize the contents of underneath your sink, you should pull everything out and give the cabinet a good scrubbing. Then, toss out any old cleaning products or unused supplies to make room for the things that you use every day.
  2. Add some shelves. If you have enough height underneath your sink to do so, add a shelf to maximize that space. These are available specifically for the under-sink area at most home goods stores. Choose one that best fits under your sink, making sure to account for any low-hanging pipes.
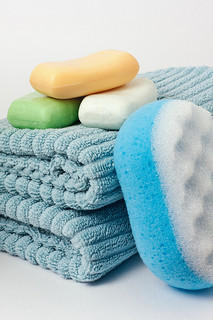
  3. Group things together. Now that you’re ready to put things back, group your cleaning products and other supplies in groups that make sense. This will be different for different people, but an example would be to group all dishwashing supplies in one area, toss them in a small plastic bin, and slide it onto one of the shelves. If you’re tackling a bathroom under-sink area, group beauty products in one bin, cleaning supplies in another, and maybe place some replacement soaps and shampoos in a third.

Clutter Make-Over of the Month: Under-Kitchen Sink [Youcopia]
Curing clutter problems in under-sink cabinets [unclutterer]
How to Organize Under Your Bathroom Sink [VideoJug]

Want to Clean Your Oven Without Chemicals? Here’s How!

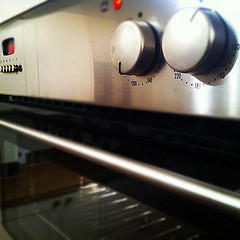
Your secret recipe for lasagna might be a smash hit within your family, but its cheesy, greasy droppings have left their mark on your oven. You don't have to reach for a chemical cleaner, however. Instead, rely on a little bit of elbow grease and these three steps:

1) Gather your supplies.
Here's what you'll need to tackle your oven's caked-on grease and grime: liquid dish soap, white vinegar, water, and baking soda. (You can add a few drops of scented essential oil to the mix, if desired.) Combine the ingredients to form a paste (recipe here).

2) Spread and sit.
Put on a pair of rubber gloves, and spread the paste all over the interior of your oven, avoiding the heating elements. For maximum effectiveness, allow the paste to sit at least eight hours—or longer, if possible.

3) Rinse and shine.
Using a damp cloth, wipe the paste from the oven. This will likely require several wipe-downs, so be sure to rinse the towel frequently throughout the process. Should grease remain in any particular area, reapply the paste mixture to the spot, allow it to sit an additional 30 minutes, then rinse. Repeat as needed.

How to Clean an Oven With Baking Soda and Vinegar [The Kitchn]
How to Clean an Oven Naturally [MNN]
Make Your Own Inexpensive Natural Oven Cleaner [YumUniverse]

Learn Something New With These Helpful Websites

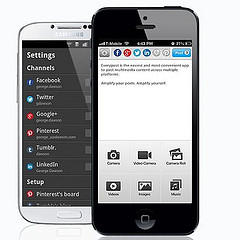
Most of us spend at least a few hours a day checking Facebook, Twitter, Tumblr, and other websites that are known to be "time wasters." Why not balance those social media updates with websites that actually put your time to good use and help you learn something? Here are five of our favorites:

Instructables
Do you see DIY projects on sites like Pinterest and wonder how you can make them yourself? Stop pinning those projects and start making them using the helpful instructions on instructables.com.

Coursera
Colleges all around the country are offering free courses on topics from playing guitar and nutrition to physics. Each class is taught over a couple of weeks via videos and webcasts, and courses involve different amounts of work. Sign up for as many as you want and start learning.

TED Talks
TED is not actually a person named Ted. The acronym stands for technology, entertainment, and design. Watch these thought-provoking videos on all types of topics, like the digital age, violence, and marketing.

Goodreads
Find your next favorite book on Goodreads. Keep a running list of all the books you've read, and the website will recommend books you may like based on past selections. You can also connect with friends to see what they're reading.

Pin It on Pinterest